Showing posts with label oopsies. Show all posts

15 September 2011

A quick sewing fail...

...to show you I still care. I would love to bring you an awesome sewing project that I finished on my awesome new sewing machine. But that's not how it always works out (unfortunately!).

A couple things to share before I get to the embarrassing pictures. Saturday Hubs and I went to the Air Force Ball. It was fun, see?
(Side note: I wish I had a recording of what was said at the ball about those families that can't be with their loved ones. It was really touching and they had an empty table set for POW/MIA. We took some time to think about the sacrifices others have made for our freedom. I know I completely took that for granted before Hubs was in the military and I wish everyone could hear things like what was said at the ball. Sorry I'm not better at recreating the sentiment!)

But I didn't plan ahead very well and ended up with way too much to do on Saturday. Friday night (I think, could've been Saturday morning I'm not really sure now) I knew I needed a bag for the ball and I didn't have anything. Yeah, no black or silver clutch or small bag. You'd think with all the bags I have ONE of them would work. Nope. 

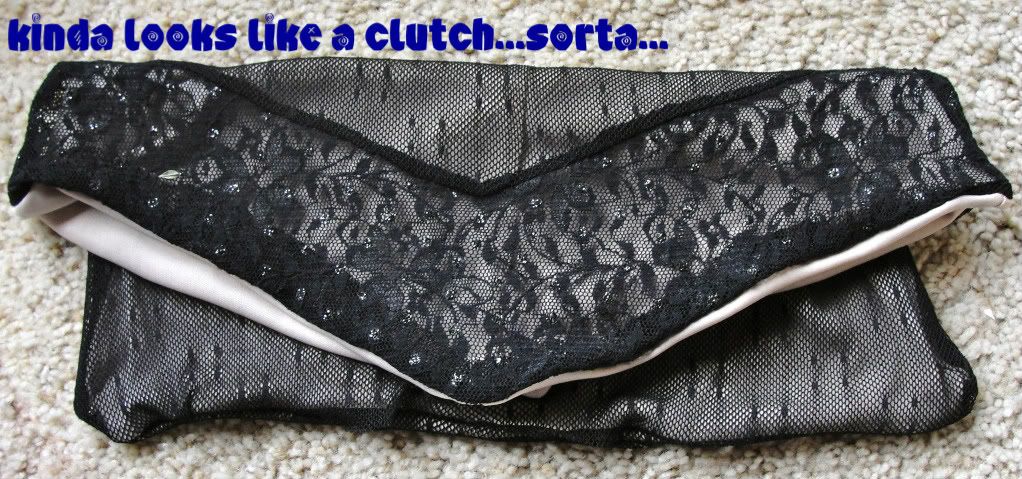
No problem, I've made clutches before and it's pretty quick. Except I had no nice fabric or neutral fabric. So I went to my closet. Not a whole lot there either. Apparently I'm more of a casual fabric kind of girl. I found a dress that was in the "goodwill, oh wait I might use that for a project so don't take it yet" pile. Too small for me but black and lacey (lacie? who knows...). Anyway I cut and I sewed. Quickly.
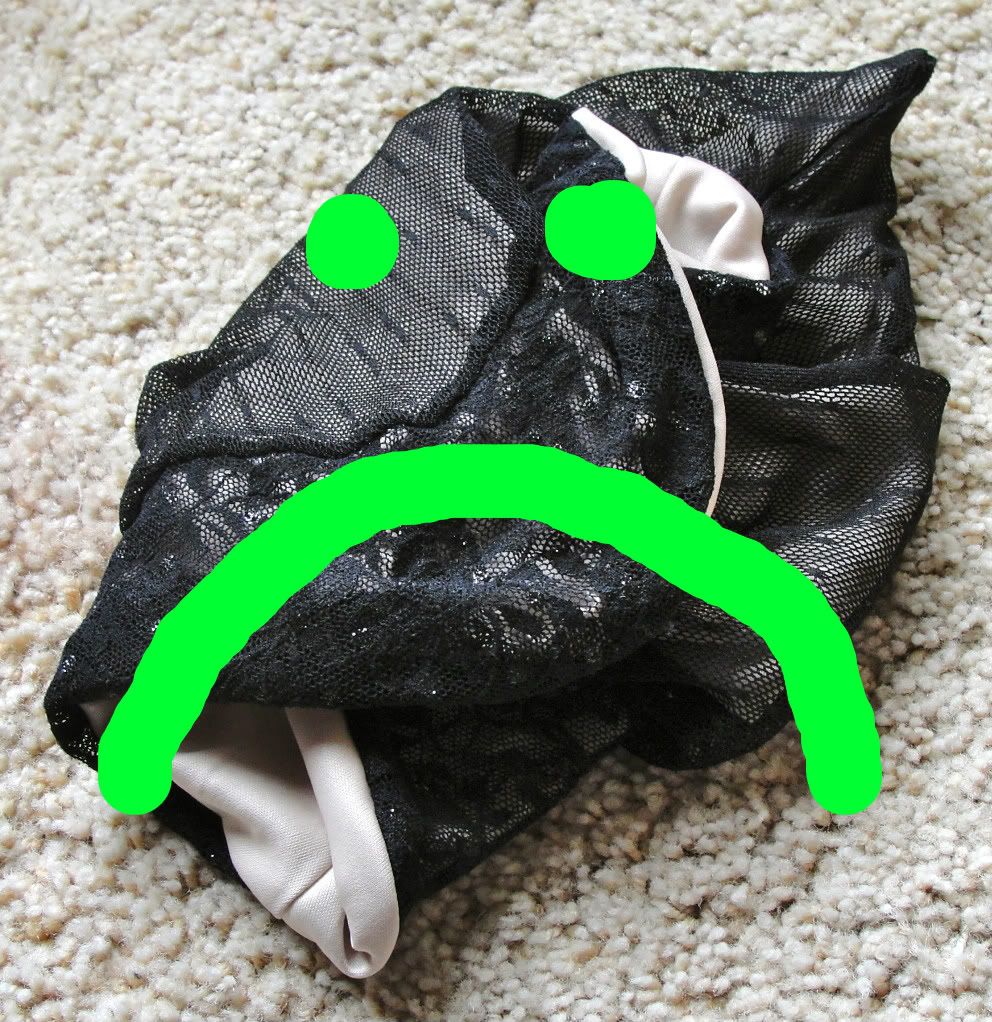
It was bad people. I had never sewn with lace or such thin stretchy material. I had never sewn with that sewing machine before. It roughly resembled the shape of a clutch.
I knew I needed to use interfacing because it was way too flimsy but I didn't want to get out the ironing board so the floppyness of it is totally my fault. I will say the machine did an amazing job of sewing the stretchy fabric. It even had a stitch specifically for stretchy fabric!

I didn't have the hang of manuvering the stretchy fabric in the sewing machine though so I didn't even catch the lace in some sections. I ended up using a tiny black wristlet that was only big enough for my id and lip gloss. Maybe my experiment would work better as a hat...
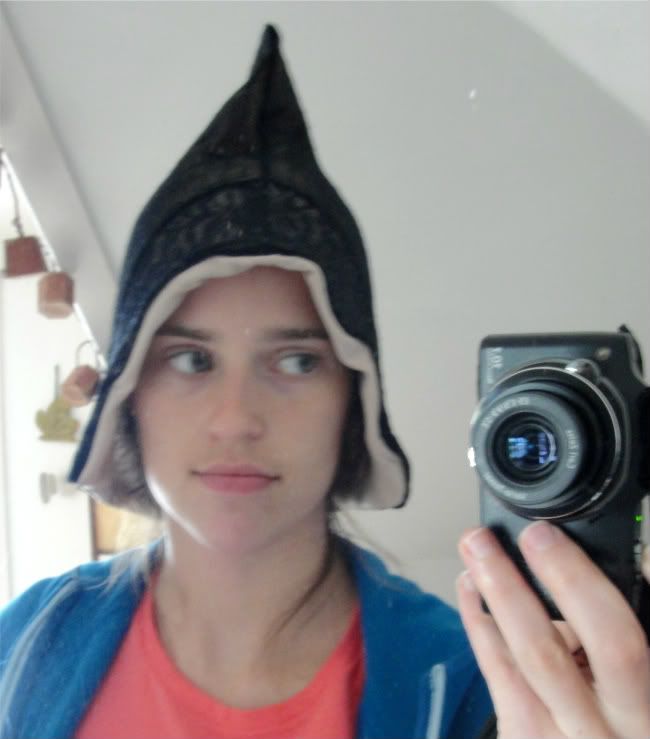
Nope, definitely not. I forgot to tell you the rest of the reason why I couldn't just try again with the clutch. It was about 3pm on Saturday (we're leaving at 5:15...or so we thought) and I remembered I needed something from the store for Bible class the next day. So I went to the store and Hubs went for a run. After, he needed a haircut. So I'm cutting his hair at 4:20. Then he remembers he needs a rope sewn onto his jacket. I put a few stitches in to hold it on and figured I could finish in the car. Then I got ready because it was close to 5pm at that point. I get dressed and put on mascara (couldn't find concealer) and go back to sewing. So I'm standing in the office, in my dress, sewing a rope on a jacket.


Probably was pretty funny. The moral of the story is plan ahead. And dresses don't always make good purses. But you can still have fun even if you were super rushed and have no bag. See? That's the look of fun people.
post signature

08 August 2011

The patio chair lives!

Thanks to Jeff's idea, my chair was not a total bust. Yay! Weaving turned out to be the winning solution. (If you're lost, click here to see the chair fail last week.)
I'm so happy that the chair could be rescued. I never like to see a project totally fail because I hate wasting pretty fabric time and/or money.

As I was desperately trying to come up with a solution for the last disaster, I attempted sewing velcro onto the chair seat kinda like this.
That didn't work. At all. Maybe it would've worked if I only weighed 50 pounds or something. I wasn't sure if I had enough fabric left to weave the second chair seat, so I briefly tried just velcro-ing the first attempt on top of the existing seat. It looked a little funny since it didn't match the woven chair so I didn't so with that. That and Hubs didn't like it and said I needed to weave both of them if it was going to look right (I agreed, I was just trying to avoid extra work).

I did end up having enough to weave the other seat (yay!), so we have two chairs again! We've actually had two chairs again for almost a week, I've just been terribly slow trying to keep up with the blog lately.
Don't they look great on our new balcony? I don't think I have a before picture of the balcony, but let me assure you the new tile and railing are an upgrade (and more structurally sound)!
Now I'm just waiting for it to make it above 65 degrees (I know, please don't hate me) so I can enjoy it without a jacket! Not holding my breath though since it probably won't make it until next month. Also, if you need a break from the heat, come to central CA and you can freeze in the Pacific Ocean and wear a jacket all summer.

Oh, and if you want tips on weaving a chair seat out of fabric I would suggest going to the chair weaving tutorial at First a Dream. I read through that before I started mine and it was helpful. I made my strips quite a bit wider than hers so it really didn't take me very long.
post signature

02 August 2011

Patio Chair Redo...or Redon't

In case you think you might be the only person that has DIY disasters, this post will reassure you that everyone gets in way over their head sometimes...

After starting this project I quickly discovered I really didn't know what I was doing. I've had these two patio chairs for probably four years and they were beginning to show their age.
The fabric along the seams of the seat was starting to separate.
For fabric that was literally thread bare, it was ridiculously hard to get off. As I was trying to get the fabric off in one piece (so I could copy the size) I also found those chairs were reeeally good at hiding dirt (and one spider, eek!).

I won't dive into all the dimensions and details since the chances of somebody having the exact same chairs is kind of slim (that and I really have no idea what I'm doing). I cut the new fabric (that my sis got me for my bday!) based on the size of the fabric I took off of the chair. Does anyone else's living room look like this during a project?
This is a preview of what I was hoping for...thanks to some strategically placed chip clips. : )
Things were going pretty well, I got the back of the chair connected and even managed to find 2 of the screws that disappeared somewhere along the way.

Unfortunately that's the end of the good luck on this project. I couldn't get the cross bars off of the bottom (who uses a totally round screw anyway? It's absolutely impossible to remove) so my plan to sew first and then slide the seat fabric on went down the drain.
So for the moment this is the chair.
Not awesome. I'm just glad I didn't take both chairs apart, so one person can still sit on the balcony! I'm not exactly sure where to go from here. I'd really like to have 2 chairs again. I thought about trying to fashion some kind of hard platform for the seat and then make a cushion out of the fabric...or something. Any ideas?
post signature

19 June 2011

Clay - not my favorite medium

So my sis is visiting this week. Yay!
(Hopefully she'll still read my blog after I posted the picture she told me to delete...love you sis!) I thought it would be fun to try something new.
 from one of my Pinterest boards: link
Aren't those cool? Yeah, and didn't seem too hard so I picked up some clay at the craft store. Weellll have you ever used this stuff? Here are the detailed instructions:
Really, Sculpey?? That's all you can give me? How about a 6th line or something. No tips on making the shape or what to do when your clay starts smoking in the oven? Since I know absolutely nothing about clay I got two little packages. I thought that should be enough for a few little bowl plates...wrongo.
And we used hot glue sticks to roll it out...real professional-like. What? I didn't want to stain my nice bamboo rolling pin.
Not the best method, in case you're wondering. Also, you should probably use one package per dish unless you want your dish to be somewhere between cardstock thickness and 1/4". After lots and lots of futile rolling, it was time to cut out our dishes.
I knew there was a reason I kept those tiny plastic swords.  They worked like a charm (it's about time something worked right with this project)!
I had this idea to use a toothbrush holder I found in the bathroom to give it some texture.
My practice pieces turned out pretty cool...not so much on the actual dish.
Time to cook these things! We put them on oven-safe bowls so they would curve up on the edges.
We'll gloss over the part where there was a funky smell coming from the oven and perhaps a tiny bit of smoke coming off the clay. Apparently I didn't have the cooking time exactly right.
Looks like they didn't exactly turn out perfectly.
Oh well.
We still had the pearly clay to work with! Let's get this disaster over with Yay! I went for a mini tree that would hold my hair ties. My sis went for her initials and a flower. I had to hold mine up with thread because it wasn't exactly structurally sound before I baked it.
Andrea's turned out well...
Mine, not so much...this is what I saw when I opened the oven to stick Andrea's in.
I thought maybe I could fix it, but turns out I definitely couldn't.
Oh well, still fun to spend time with my sis and learn that I much prefer sewing to sculpting! More fun from our visit coming this week : )

post signature

08 April 2011

Friday Fun - a few crafting oopsies

I thought everyone might enjoy a few funny pictures from when things didn't go exactly as planned.

First off we have hanging a picture frame.
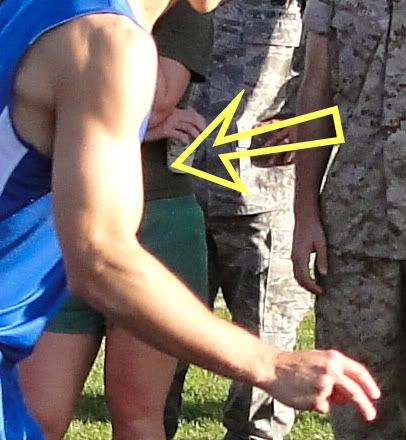
No, that is not how pushpins or nails are supposed to look. Our house has many different walls. You can't be sure which type you'll get until you start trying to hang something up. On some walls, nails go in really easily (probably too easily actually). Others chew up your nails and spit them out. We have no idea what this mystery material is, but when Hubs doesn't get the nail in you know it's the wall not the hammerer. I mean look at his arm...
And that's not even flexed! Anyway (he'd probably be totally embarrassed that this is online so moving on!) we've had better luck drilling a tiny hole and then putting the nail in.

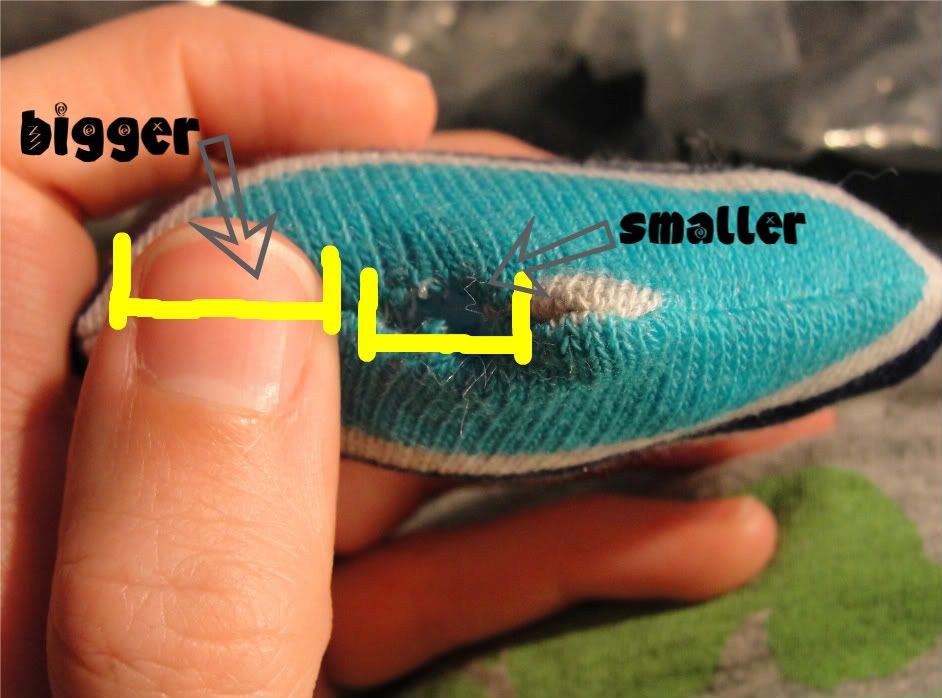
Another issue I run into pretty much every time I sew is leaving a hole for turning. For some reason I seem to think I can stuff something through a hole that is smaller than my pinky. No really, look at this hole that I had to fit stuffing through for a toy.
Smaller than my finger. If you couldn't tell, I went ahead and spelled it out for you. You're welcome : ) It's the same story with bags. I think I can stuff the entire thing through a 1-2" hole. When will I ever learn??
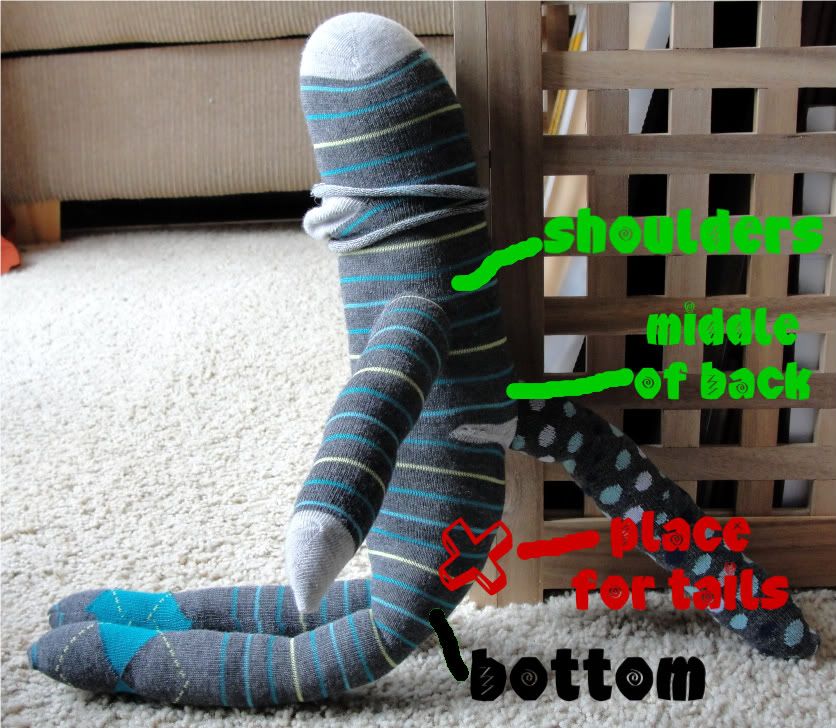
And finally, a sock creature disaster.
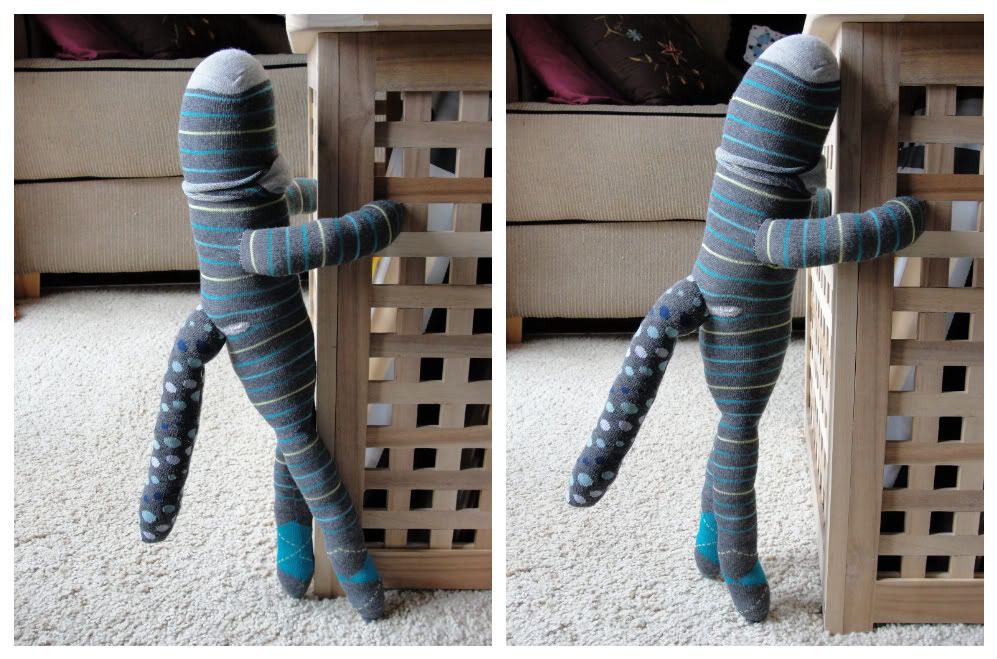
Oh, you don't think it's looks to bad (other than the unfinished face)? Well you haven't seen the back. Those with a weak stomach may want to turn away.
Ok so it's not horrible. But what kind of animal (even a fictitious sock animal) has a tail in the middle of its back? I can think of none. How did this happen? I wish I knew. Still not seeing the horror? Let me point out some landmarks to give a little reference.

Pretty sure he would have a sad face if he had a face right now. Perhaps a tail-ectomy would help this little guy. I guess I may be being a little over-dramatic about this oopsie, but I still don't think he's ready to be given to a child since they may be terribly confused about the random appendage coming out of his back.

Enjoy your weekend (and please leave adequate holes for turning)!

post signature


PS - just found out I won a giveaway at A Law Student's Journey! I don't think I could be more excited. And yes, I may have just done a little dance in my chair : ) More on this later!