In case you missed my guest post at
Sweet Bella Roos last week...here's my latest project! Ok not technically my latest, my latest is actually sewing new ranks on Hubs' uniforms (way to go Hubs!)...good thing I brought my sewing machine in the car with me!
Have you seen these bracelets around recently?
I may have pinned one or two
or five. But obviously I wasn't going to pay $30 for something that seemed so easy to make. (Key word there is "seemed")
So I set out to make my own. Michael's had a tutorial online for one and I looked at it basically to get a supply list then I figured the rest out as I went along.
Here's what you'll need:
- 4mm or 6mm beads (I used 6mm)
- Round leader cord (two 30" pieces for wrapping twice around, I had several extra inches at the end but I also have tiny wrists)
- Large-ish button
- Beading thread (whatever that is, or you could use beading wire...seems like that might be easier)
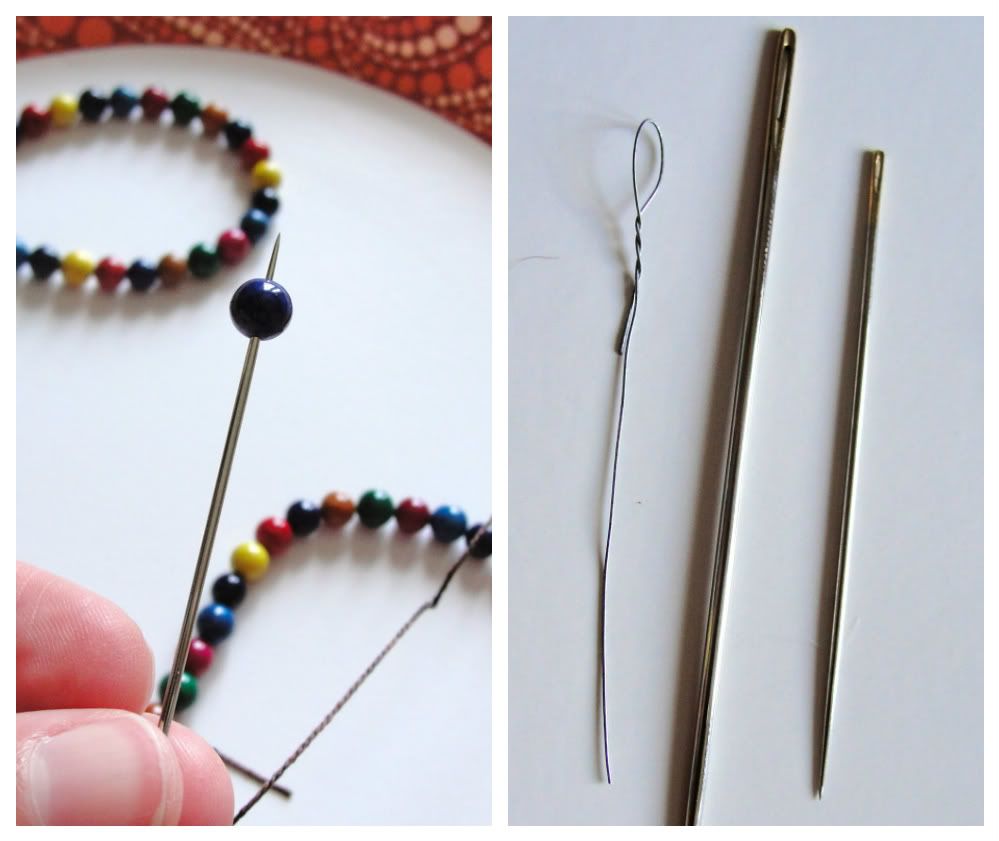
- Needle that's meant for threading jewelry (trust me on this one)
And that's why you need a needle for jewelry making. I thought I could just use one of my sewing needles, but when I found a needle big enough for the beading thread it was too big to fit through the bead. I made a makeshift "needle" using a piece of picture hanging wire. It was flexible, so that big loop squished down to be basically flat after I went through the first bead.
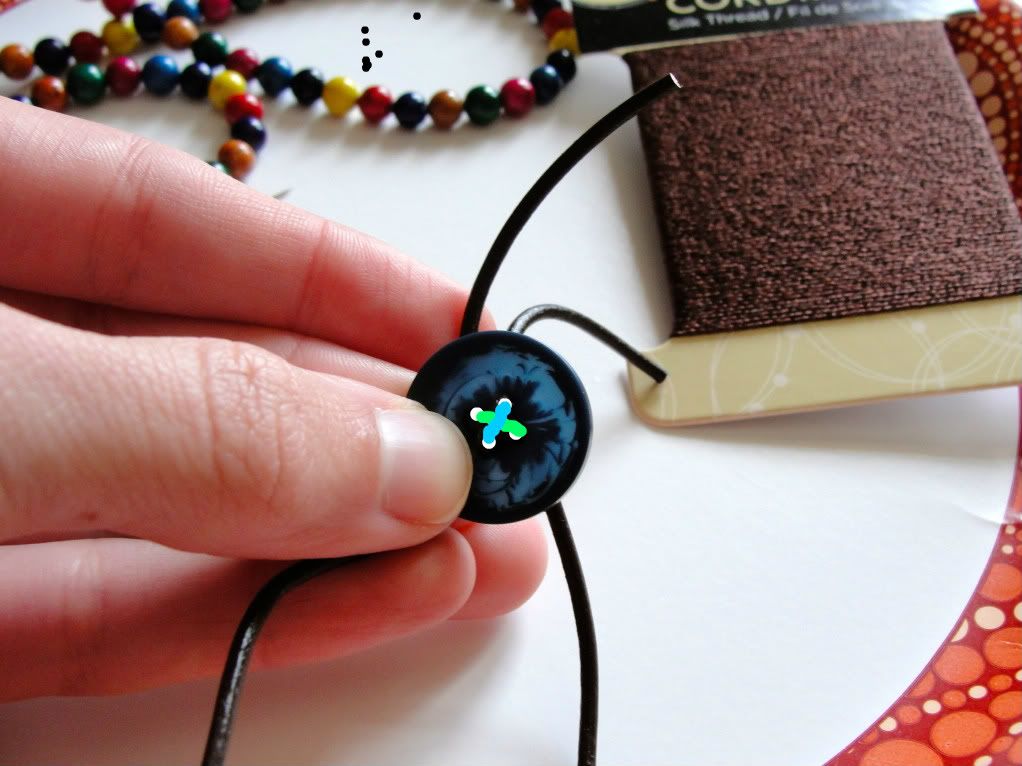
I threaded the button onto the leather cord first to get it out of the way. How you attach it will depend on how many holes your button has. Mine had four so I did this (I outlined the two different pieces in green and blue so it's a little easier to see):
Then you're going to make a knot. I tied the end piece to the long piece on each side, then tied both long pieces together. I found that it was helpful to have something holding the leather pieces in place, so you have one less thing to mess with. I used this for a while, but I think it would be even easier if you could secure both ends somehow.
The next (million) steps are where it gets a little dicey. Cut off a pretty good length of thread (20 inches or so, you want to be able to get lots of beads on with it but you don't want it to be so long that it's constantly in the way). Tie a knot in the end of the thread and put your first bead on.
I'm going to try to illustrate the threading process because taking picture while I was doing it
was way harder than I could handle didn't show the steps very well.
So here's what it looks like without all the arrows (that little red blob at the beginning is the knot by the way):
Now what's a girl to do when she runs out of thread? Good question. Tie your thread off. I made a knot around one of the leader cords. Then cut some new thread to work with. I made a couple knots around the thread of the previous bead to attach it. You could attach it straight to the cord probably but I didn't want it sliding down.
Now this whole thing might seem a little overwhelming. And at first it is. But around the time you think you won't finish until next Christmas you'll start to get the hang of it and find a way to thread the beads that's slightly more efficient than the sloppy way you started. Or maybe that's just me (mine did not start off well).
Once you get to the length you want (or close to it...my loop adds an inch to the overall length) you'll need to make a loop to go over the button. I'm going to send you to another site for tips on knots because
I can't remember exactly what I did and I'm pretty sure it's not even a real knot they already have nice illustrations and even animations of knots. I would suggest the
figure eight or maybe the
yosemite bowline.
So there you go. Perfect for gifts or yourself! I think I spent less than $10 and I had plenty of cord and thread left
for at least one more bracelet. Much nicer than $30 bucks plus shipping,
right?
Also, I am clearly not qualified to be a hand/wrist model so please forgive the next few awkwardly posed shots. :)


