Showing posts with label furniture. Show all posts

18 October 2011

Ugly chair turned...less ugly

We moved. That's kind of old news now, but I thought I'd give you a little background on why I'm redoing a random chair. We knew ahead of time this would be a temporary move (6ish months or less) so we only brought what we could fit in our cars. We planned on renting a furnished apartment, even had one picked out.

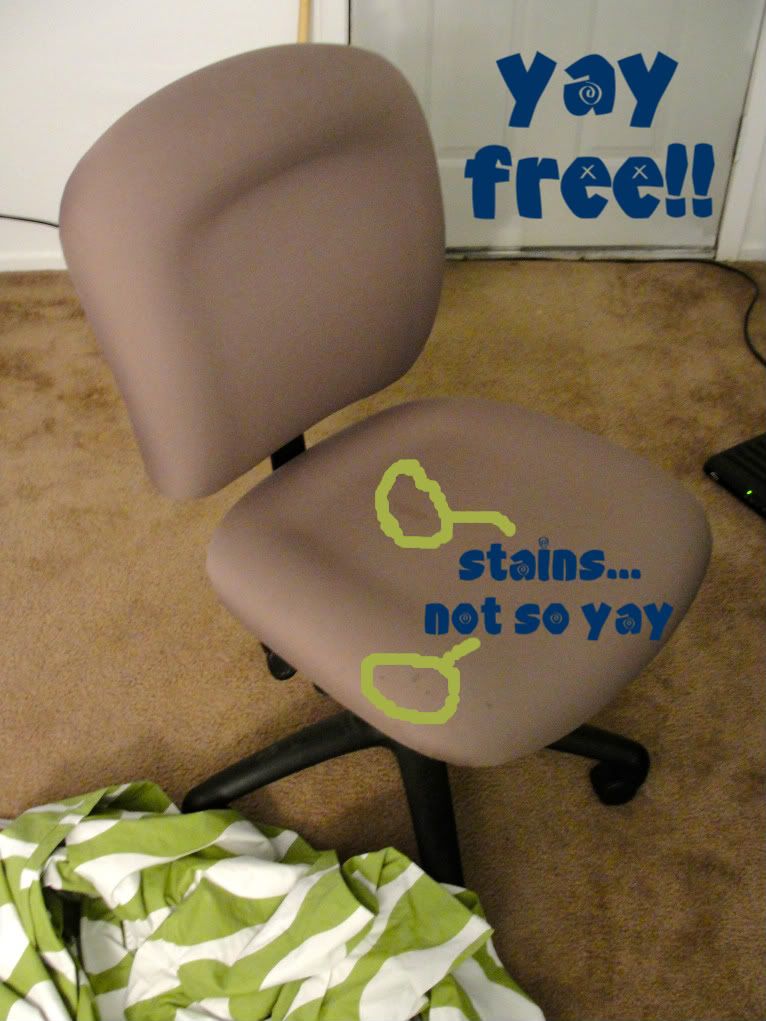
Unfortunately that place fell through and we couldn't find anything furnished for such a short time. So we moved into a different apartment and had absolutely no furniture! Thanks to cheap stuff at Walmart, thrift stores, and some very kind people we now have enough furniture for the time we'll be here. I picked up a couple office chairs for free on base (which is great because I'm pretty sure sitting in a camp chair to work for 8 hours was going to get old quickly).
Photobucket
I also grabbed a duvet cover for free and planned on using it on the futon or something once we were reunited with our furniture. But I really wanted to cover the chair and I really didn't want to use the fabric I brought with me (yes, I brought fabric but mostly just what I was planning to use for christmas presents). So the duvet was elected to be the new chair cover. I'll quickly run through the steps...
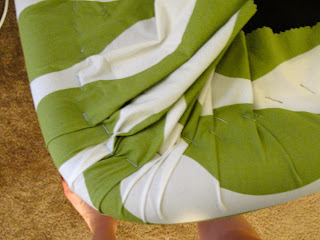
Cut a piece big enough to cover the bottom and have plenty to overlap on the bottom. Don't bother ironing because it will be stretched out anyway and getting the iron out seems like wayyy too much trouble. Staple once on each side just to hold the fabric in the right spot while you flip the chair over.
I didn't want to take the chair apart, there were way too many things undone in the apartment for me to create another undone thing. So I leaned it precariously against the wall as I worked. Get your stapler ready for the next part!
Pull the fabric tight and staple like there's no tomorrow. I just used a regular old stapler, but a staple gun might be more effective because I did have some staples that didn't take the first time.
After you've stapled the whole thing, trim the excess. Then flip your chair over and marvel at the fact that your bang up job looks somewhat presentable.
My chair was upholstered even on the back of the seat, so I could use the "staple haphazardly" method for the seat back.
I pinned two pieces of fabric together over the chair, right sides together. (Because I seem to vaguely remember someone using this method to reupholster a couch so it seemed like the professional way to go...at least compared to stapling fabric all over the place.)
If your chair tapers in toward the bottom like mine did, you shouldn't pin all the way down. Unless you don't want to put it on after you sew it. I only pinned about halfway down so it wouldn't be so small at the opening that it wouldn't fit over the top. Sew around the edge and turn it right sides out then slip it on.
Now how to sew up the bottom half of the seat cover...that's a good question. My method involved some hand stitching and a safety pin on one side. I plan on coming up with a more permanent solution eventually, but for now I'm good with the finished product. (If I was doing this over again I would hem the bottom edge of the seat cover so I didn't have to worry about sewing it close.d)
Is it perfect? No. Is it exactly what I need for the next several months? And is it way more pleasant to look at than a stained brownish/pinkish chair? Yes and yes!
So what could you not move without? Tonight I was wishing I had my George Foreman grill that didn't make the cut (and wishing I'd remembered to pack the salt and pepper...guess I'm headed to the grocery store again!).
post signature

10 August 2011

3 for 1

Since I've been neglecting my poor blog lately you get a 3 for 1 post. Lucky you (I think). Saturday I ran my first 1/2 marathon! I've been training with a friend from church and we ran it together. I'm glad I had someone to run with because I don't think I would've stuck to the training schedule without a running partner. I was excited to finish (that was the farthest I've ever run) and we even finished near our ideal goal time.
I haven't decided yet whether to shell out the $13 for a print or $30 to download the picture (can you say rip-off??) so for now you get the tiny, poor quality, watermarked version. That's probably best though since I found out I'm not a very photogenic runner (this is the only one I wasn't embarrassed to put online even though my hair appears to be growing out the side of my head).

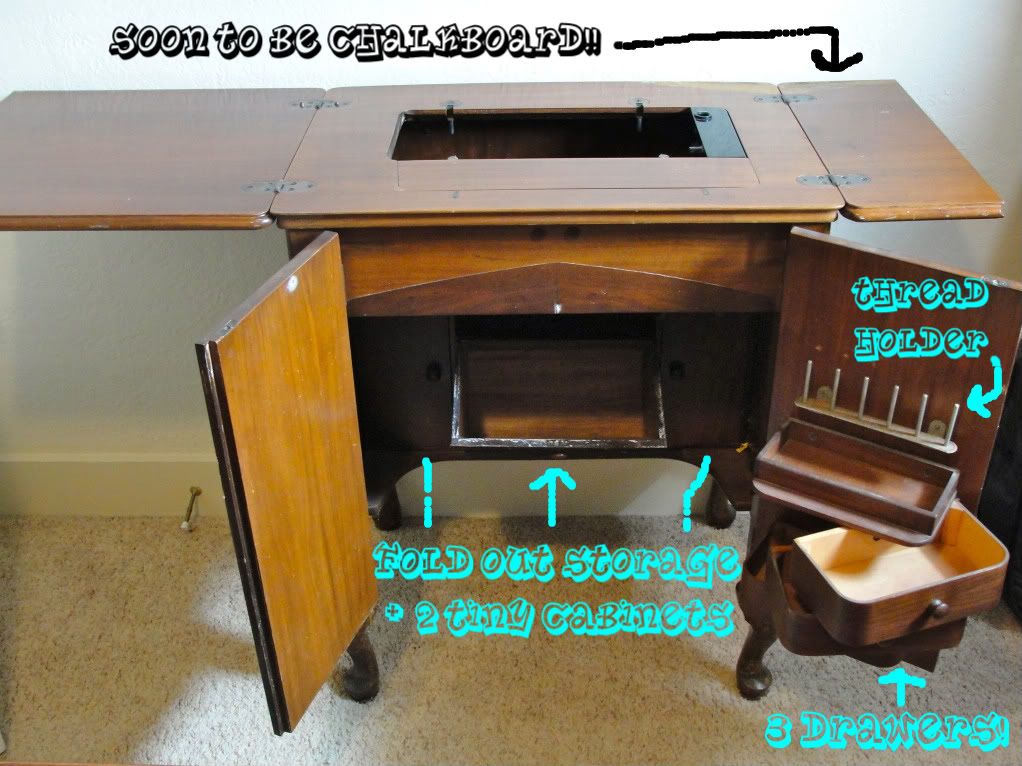
Other than that it was a lazy weekend for me. When we were driving home from church on Sunday we decided to stop at a garage sale. That turned out to be a great idea! There was a sewing table up front for only $20!
The outside could use a little TLC, so I'm thinking about painting the whole thing. (Thankfully those spots on the front aren't bubbles in the finish, just discolored so I'm hoping I won't have to do very much sanding) What I like most about it is the storage on the inside!
Check out all of those drawers! I'll have to find some way to cover the hole because I'm planning to get a new sewing machine and a new sewing machine won't fit in the hole. I'm looking for a little painting advice though. I have no idea where this guy will reside after we move (and move again) later this year. So should I go with a neutral color in case it winds up in our bedroom again or go with a fun color for an office/craft room? (I won't necessarily go with any of these colors, but I am liking the teal right now)
I plan on painting one of the fold-out sides with some leftover chalkboard paint so I can jot down measurements during a project! (Can you tell I'm excited about that part because I am!) I always end up using a tiny scrap of paper that gets lost sometime in the 3 weeks days it takes me to finish a project.

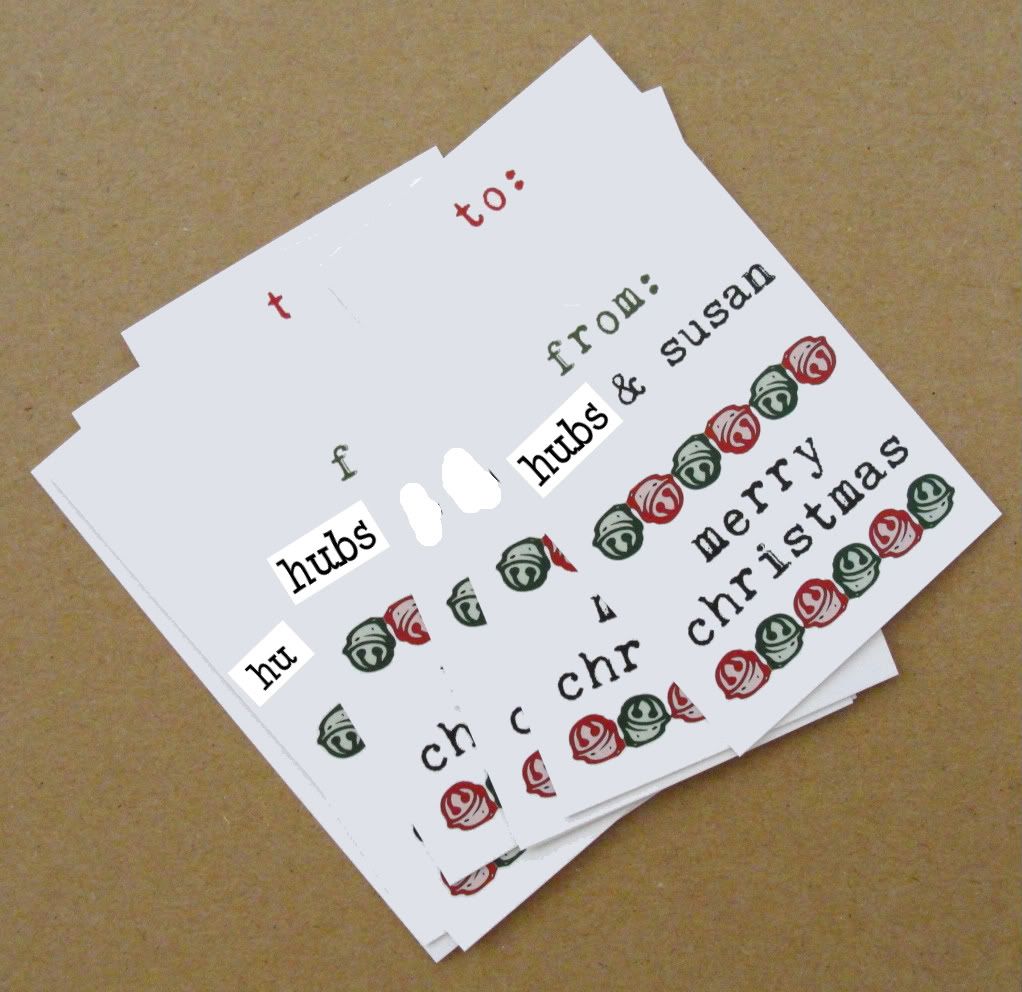
In other news I got some labels from Uprinting.com last week. I won a giveaway from Mrs. Yellow Ribbon (thank you!!) and got to make 250 free labels. I went with Christmas tags and it was fun getting to come up with a design. You pretty much start from scratch and can upload images and add text to the label.
(Umm no, they don't really say hubs & susan, but I want hubs to remain anonymous so you'll just have to trust that they look better in real life without my computer coverup job)

I love how they turned out! The tools they give you to work with are very basic, but if you already have a design created on your computer you can just upload the image and you're ready to go. We wrap our presents in brown paper every year and usually I stamp the to/from info on the package. I was excited to find a font that's kind of close to the stamps I used. Hellooo less stamping and more free time around Christmas!

So what have you guys been up to this week? And what color should I paint my new table? And what...just kidding, I only had two questions. : )
post signature

08 August 2011

The patio chair lives!

Thanks to Jeff's idea, my chair was not a total bust. Yay! Weaving turned out to be the winning solution. (If you're lost, click here to see the chair fail last week.)
I'm so happy that the chair could be rescued. I never like to see a project totally fail because I hate wasting pretty fabric time and/or money.

As I was desperately trying to come up with a solution for the last disaster, I attempted sewing velcro onto the chair seat kinda like this.
That didn't work. At all. Maybe it would've worked if I only weighed 50 pounds or something. I wasn't sure if I had enough fabric left to weave the second chair seat, so I briefly tried just velcro-ing the first attempt on top of the existing seat. It looked a little funny since it didn't match the woven chair so I didn't so with that. That and Hubs didn't like it and said I needed to weave both of them if it was going to look right (I agreed, I was just trying to avoid extra work).

I did end up having enough to weave the other seat (yay!), so we have two chairs again! We've actually had two chairs again for almost a week, I've just been terribly slow trying to keep up with the blog lately.
Don't they look great on our new balcony? I don't think I have a before picture of the balcony, but let me assure you the new tile and railing are an upgrade (and more structurally sound)!
Now I'm just waiting for it to make it above 65 degrees (I know, please don't hate me) so I can enjoy it without a jacket! Not holding my breath though since it probably won't make it until next month. Also, if you need a break from the heat, come to central CA and you can freeze in the Pacific Ocean and wear a jacket all summer.

Oh, and if you want tips on weaving a chair seat out of fabric I would suggest going to the chair weaving tutorial at First a Dream. I read through that before I started mine and it was helpful. I made my strips quite a bit wider than hers so it really didn't take me very long.
post signature

02 August 2011

Patio Chair Redo...or Redon't

In case you think you might be the only person that has DIY disasters, this post will reassure you that everyone gets in way over their head sometimes...

After starting this project I quickly discovered I really didn't know what I was doing. I've had these two patio chairs for probably four years and they were beginning to show their age.
The fabric along the seams of the seat was starting to separate.
For fabric that was literally thread bare, it was ridiculously hard to get off. As I was trying to get the fabric off in one piece (so I could copy the size) I also found those chairs were reeeally good at hiding dirt (and one spider, eek!).

I won't dive into all the dimensions and details since the chances of somebody having the exact same chairs is kind of slim (that and I really have no idea what I'm doing). I cut the new fabric (that my sis got me for my bday!) based on the size of the fabric I took off of the chair. Does anyone else's living room look like this during a project?
This is a preview of what I was hoping for...thanks to some strategically placed chip clips. : )
Things were going pretty well, I got the back of the chair connected and even managed to find 2 of the screws that disappeared somewhere along the way.

Unfortunately that's the end of the good luck on this project. I couldn't get the cross bars off of the bottom (who uses a totally round screw anyway? It's absolutely impossible to remove) so my plan to sew first and then slide the seat fabric on went down the drain.
So for the moment this is the chair.
Not awesome. I'm just glad I didn't take both chairs apart, so one person can still sit on the balcony! I'm not exactly sure where to go from here. I'd really like to have 2 chairs again. I thought about trying to fashion some kind of hard platform for the seat and then make a cushion out of the fabric...or something. Any ideas?
post signature