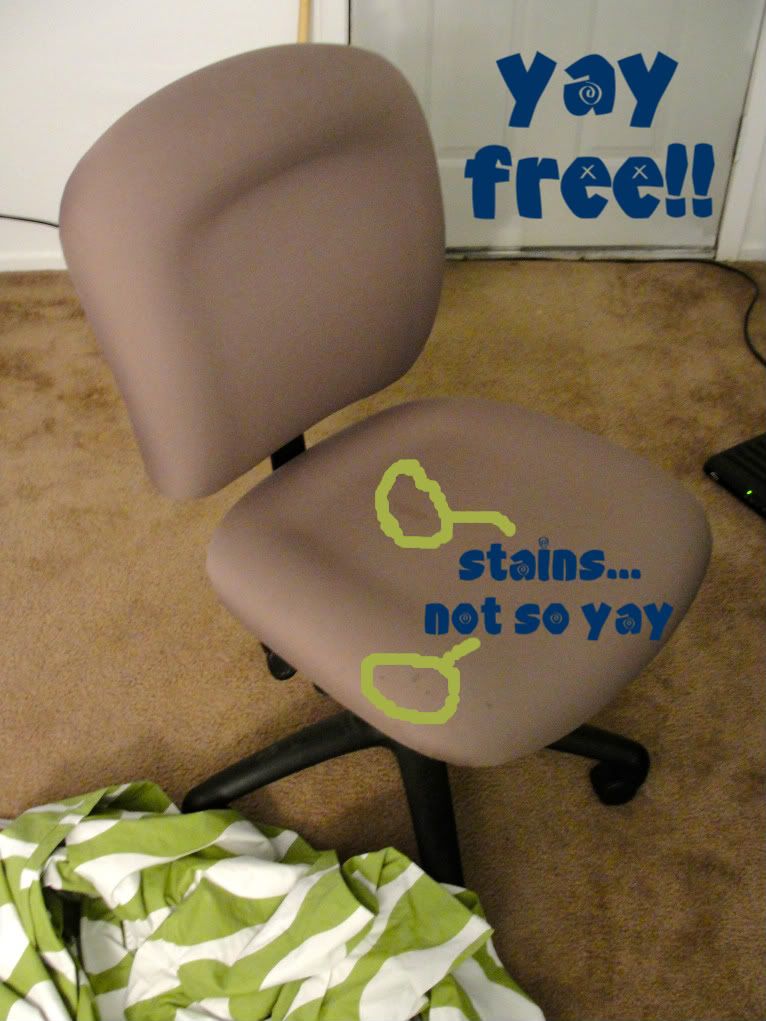
Unfortunately that place fell through and we couldn't find anything furnished for such a short time. So we moved into a different apartment and had absolutely no furniture! Thanks to cheap stuff at Walmart, thrift stores, and some very kind people we now have enough furniture for the time we'll be here. I picked up a couple office chairs for free on base (which is great because I'm pretty sure sitting in a camp chair to work for 8 hours was going to get old quickly).
I also grabbed a duvet cover for free and planned on using it on the futon or something once we were reunited with our furniture. But I really wanted to cover the chair and I really didn't want to use the fabric I brought with me (yes, I brought fabric but mostly just what I was planning to use for christmas presents). So the duvet was elected to be the new chair cover. I'll quickly run through the steps...
Cut a piece big enough to cover the bottom and have plenty to overlap on the bottom.
I didn't want to take the chair apart, there were way too many things undone in the apartment for me to create another undone thing. So I leaned it precariously against the wall as I worked. Get your stapler ready for the next part!
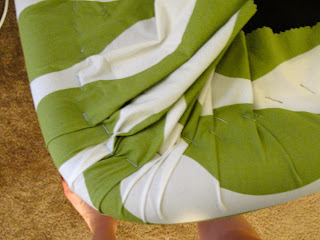
Pull the fabric tight and staple like there's no tomorrow. I just used a regular old stapler, but a staple gun might be more effective because I did have some staples that didn't take the first time.
After you've stapled the whole thing, trim the excess. Then flip your chair over and marvel at the fact that your bang up job looks somewhat presentable.
My chair was upholstered even on the back of the seat, so I could use the "staple haphazardly" method for the seat back.
I pinned two pieces of fabric together over the chair, right sides together. (Because I seem to vaguely remember someone using this method to reupholster a couch so it seemed like the professional way to go...at least compared to stapling fabric all over the place.)
If your chair tapers in toward the bottom like mine did, you shouldn't pin all the way down. Unless you don't want to put it on after you sew it. I only pinned about halfway down so it wouldn't be so small at the opening that it wouldn't fit over the top. Sew around the edge and turn it right sides out then slip it on.
Now how to sew up the bottom half of the seat cover...that's a good question. My method involved some hand stitching and a safety pin on one side. I plan on coming up with a more permanent solution eventually, but for now I'm good with the finished product. (If I was doing this over again I would hem the bottom edge of the seat cover so I didn't have to worry about sewing it close.d)
Is it perfect? No. Is it exactly what I need for the next several months? And is it way more pleasant to look at than a stained brownish/pinkish chair? Yes and yes!
So what could you not move without? Tonight I was wishing I had my George Foreman grill that didn't make the cut (and wishing I'd remembered to pack the salt and pepper...guess I'm headed to the grocery store again!).


Delightful again!Writing about what you are up to is as fun as your project. Pleasing placement of pattern. You continue to "make do" with what you have. Guess the second chair didn't match the one you redid.
ReplyDeleteYour folks picked us up at the airport. Fun time in N.C. Glad we got to skype with you. Marme
Oh I love this. I got a chair exactly like this one for free, but it's UGLY. I have tons of scrap fabric, but I had no idea how to even begin covering the seat. I'm going to refer back to this and give it a try. Thanks so much.
ReplyDeleteWell, I love the pattern. And you did a great job, I think.
ReplyDeleteImpressive! Love the new look. :)
ReplyDeleteForget perfect! This is awesome!! I love that pattern! Your chair looks a hundred times better now!
ReplyDeleteOh my gosh!!! I LOVE this!!! So clever!
ReplyDeleteit's outstanding! bravo.
ReplyDeletefound you via the weekend wrapup party and think you may like my special shabby chic giveaway:
http://hellolovelyinc.blogspot.com/2011/10/rachel-ashwell-on-creating-authentic.html
thanks so much for sharing!
warmly,
michele
looks great! love, love, love your fabric!! :)
ReplyDeleteThat looks awesome! Great re-do! I'd love for you to share it here:
ReplyDeletehttp://oneartmama.blogspot.com/2011/10/csh-thursday-link-party.html
this looks awesome!! I totally need to do this on one of my chairs
ReplyDeleteSuch a cute transformation!
ReplyDeleteYour chair turned out great! I really like the fabric you chose! =)
ReplyDelete...so sorry, I tried to send you a msg, but it wouldn't let me... I'm going to grab a button and put it on my new blog! I want to promote other Christian bloggers. God bless!
ReplyDeleteAmazing insights on choosing the right chairs! I recently explored Vibecrafts’ collection, and their stylish and comfortable chairs really enhance interiors while offering great durability.
ReplyDeleteI recently explored some amazing chairs at Vibecrafts, and I must say the collection is stylish, durable, and perfect for modern homes. From accent chairs to comfortable lounge pieces, they have designs that truly uplift any space. If you’re looking to add both comfort and elegance, Vibecrafts is definitely worth checking out.
ReplyDeleteThis blog perfectly explains why office chairs are a must-have for comfort and efficiency. An ergonomic chair not only prevents back pain but also boosts productivity. If you’re planning to buy high-quality and stylish office chairs online, Vibecrafts is the best choice. Their collection offers modern, durable, and affordable designs suited for both home and corporate offices.
ReplyDeleteThis blog wonderfully explains the importance of chairs in home décor. From dining to accent chairs, the right design can completely transform a space. If you’re planning to buy high-quality, stylish, and affordable chairs online, Vibecrafts is the best choice. Their collection combines comfort with elegance, making it ideal for modern homes.
ReplyDeleteGreat post! The right office chairs truly makes a difference in comfort and productivity. I recently explored VibeCrafts’ office chair collection, and their designs are both ergonomic and stylish — perfect for any workspace!
ReplyDeleteNice articles and your information valuable and good articles thank for the sharing information office chair for home use
ReplyDelete
ReplyDeleteVibeCrafts has an amazing collection of office chairs that perfectly combine comfort, style, and functionality. Their ergonomic designs make long working hours effortless while adding a modern touch to any workspace.
Great post! A comfortable office chairs makes a huge difference during long working hours. I recently explored VibeCrafts’ office chair collection, and their designs are ergonomic, stylish, and well-built. If you're planning to buy office chairs online in India, VibeCrafts offers excellent options that enhance both comfort and workspace aesthetics.
ReplyDeleteGreat blog on chairs! Your insights on comfort, design, and practicality are truly useful. For stylish, ergonomic, and well-crafted chairs, VibeCrafts offers an excellent range that enhances both home and office spaces beautifully.
ReplyDelete