26 May 2011

Pasta Jar Pincushion

I've seen lots of idea/tutorials for pincushions, including more than a few mason jar pincushions. This was one of the first crafty things I tried that I found on a blog.

There was kind of a problem though. Most of those people had actual mason jars (with the two part lid). I, however, had a pasta sauce jar that was kind of a mason jar except the lid was all one piece. Not quite as good. So I improvised because I had to have one of those mason jar pincushions.
Maybe you can tell (a few months later) that I just hot glued my little stuffing pod to the lid. And the bottom was just some cardstock paper so it started to be not exactly flat. Here's what it looked like when I first finished. I had to add the ruffle around the edge to hide the lid. I couldn't wrap the fabric around the lid because then it wouldn't be able to screw on.
Then a light bulb went off! I'm a little surprised I thought of something so out of the box, but I'm so glad I did! I had a magnetic snap that was pretty much useless because one of the prongs on one side broke when I was pushing it down (at the time, very frustrating). The magnetized side was still in good shape though. Do you see where I'm going here?
The pasta jar lid is metal. Ding, ding ding!  Now I have a pincushion mason jar but the pin cushion is removable since it's magnetic so I can just take the pincushion part with me if I relocate to somewhere other than my sewing table!
On the bottom of the pincushion I put some cardboard (I guess you could call it that) from a small box that a necklace or something came in. I just traced the lid onto the box and cut it out. Then I used an exacto knife to cut slits for the magnetic snap. I did use hot glue again to attach the fabric to the cardboard, but last time I didn't have an issue with that part peeling.
It even sticks to the side of my sewing machine. Not that I ever leave it there, but it just seems that much cooler. : )
During my spray painting adventure I spray painted the lid so it didn't scream pasta sauce.
What do you think?? I'm still pretty excited about it - I like it much better than my last attempt! Have you done any projects recently that required you to think outside the box in order to finish it with what you had on hand?
post signature

24 May 2011

Help Wanted

I need your help. Although I almost didn't ask because this post will probably make you wildly curious about the disaster that is my "About Me" page. No, stop! Don't click up there!

Seriously though, people. I am bad at writing about myself. Hopefully that doesn't automatically make me a bad blogger. :-/ So I want to hear from you guys about what you like to find out about in an "About Me" page.

This could be stuff you generally like to read, or a burning question you've been dying to ask me for months. Ok, not really months, I think I've only had like 4 readers that date back months (3 if you don't count my mom). Hah! Or do you have any tips on how to share personal information without sounding like you're putting info out on a dating site? Example: I'm in my early 20's and enjoy coffee, cute puppies, and long walks on the beach. In that case, I shared information but also sound like a weirdo looking for a date.

So please (pretty please!) help me! Comment with your questions, truth or dares, tips for dumb bloggers who can't write about themselves, tricks for making people REALLY want to follow you, basically anything that will help contribute to making my "About Me" page slightly less lame. Thanks in advance!!
post signature
PS - It's ok if you go look at the page, if I was really that embarrassed I could've erased it. I don't think it's the worst thing ever, but it does sound a little cheesy to me and Hubs laughed at part of it the other day so it's got to go!

23 May 2011

Weekend Recap

10,000 baby!! Yep, I ran a 10,000. Oh, make that a 10k...I guess the whole k=1,000 thing doesn't really work when the k is supposed to stand for kilometers, haha. (It's ok to roll your eyes, I know it was corny.) My running buddy and I ran a 10k on Saturday. So far, every time I've run with her it's the farthest I've ever gone, including race day. I think it's safe to say she pushes me!
It paid off though because we ran the whole way and she said we even came close to a personal best for her! Our final time was 1 hr, 58 seconds. We even had some supporters cheering us on at the finish line. A couple boys from church came with signs, isn't that sweet?!
Can you make out the two people running at the top of the sign? After our race they had a few short kids races, which were fun to watch. We were all standing around chatting after and they were calling out the top 3 finishers in each age category. I wish someone had taken a picture of my face when they called my name. I was shocked. Like jaw dropping to the floor shocked.

Somehow I placed first for the females in my age group. I was definitely excited! (Although still shocked and thinking there must've been only 3 people in my group for me to have placed). I was standing way too far away from the podium to make it up there before they started the next age group, so I went to the table to pick up my medal.

Unfortunately they accidentally gave it to someone else. So you'll just have to take my word for it that I won because there are no pictures. They said they'd call me and get me another one. Also, I have several witnesses that will tell you I really did win hehe.

I know you're pretty much at your excitement threshold after reading of my 10k victory, but I still have more. Because that was only Saturday! And Sunday was our 2nd anniversary! I didn't really think of this when planning the wedding, but having our anniversary near Memorial day was a really good idea : ) We're going to Yosemite next weekend for the long weekend. We've never been and we're excited!

For the actual day Hubs got me a great bouquet and a bunch of my favorite foods from TJ's. He also got me a big ruler for my new cutting mat aaaand a rotary cutter! And some smart wool socks (have you tried those? they're great!).  We also went out for dinner and a movie. It's always fun to hang out with Hubs and I can't wait to spend the rest of my life with him!
Hope everybody had a good weekend!!
post signature

20 May 2011

Spray Paint Monster

I have a confession to make...You might want to sit down for this. I have never done a spray painting project before.

Yes, you read right. Sure, I may have spray painted something at some point in my short life, but I don't really remember spray painting anything before. Until yesterday. And where have I been? Spray painting is awesome! In fact, a spray painting monster named Susan may have been created.
We took down some random mismatched frames that were in our bedroom recently and replaced them with a big collage frame. So what do do with 7 frames? Thanks to all of you stylish people out there I've seen lots of gallery wall ideas.

Anyway, I had a cool black frame that was really four frames stuck together and I thought it would be cool to build off of that. Here's how the idea started:
And this is where the spray painting comes in. Because obviously that mismatched arrangement would look...um...quirky?

I tried to do light coats like the can suggested and I was happy with the results. I was a little worried after the first coat (below), which was probably too light, because the coverage was so bad, but things were looking a lot better after the next coat.
I probably did 3-4 coats on each and they were dry to the touch within a few minutes. I think that was my favorite part about using the spray paint. The wind was a little bit of an issue, but it's never not windy here so I just went for it anyway. I thought I had more pictures from during the process, but I guess I was just too caught up in the spray painting fun!

So here's a preview of what will go up on the wall. I'm too excited about how everything turned out to not show you right away : ) I'll post another picture once we decide on what pictures to put in the frames and get it on the wall!
post signature

19 May 2011

Upgrade

Yesterday I finally got a proper cutting mat. You may have noticed from my not-so-straight cutting lines that I don't have an ideal setup for cutting things.
We don't have any large flat surfaces that aren't wood and wood isn't exactly the best surface to cut on (unless it's a cutting board I suppose, but that's beside the point). I stole a "cutting board" from the kitchen and was using that when I cut out patterns or used an exacto knife. And by cutting board I mean a thin piece of plastic that passes for a cutting board only at the Dollar Store. It was only about 12"x15" so that didn't give me a ton of room to work with. That and since it was super cheap every little cut and scratch was there for good.

Beverly's was having a sale on cutting mats AND I had a 40% off coupon so I decided to at least check them out while I was there. Then I proceeded to stand there staring at the cutting mats for at least 5 minutes like a crazy person trying to decide what size to get. I only hope I wasn't talking to myself out loud!

I went with an 18"x24" mat, although the 24"x36" was oh so tempting. I really don't have room anywhere for something that size, so I convinced myself to go with the smaller one. Now I just have to wait until next week for my other 40% off coupon and I'll be getting a rotary cutter. Wooo! ...wow, I'm becoming lame.

And just so this post doesn't feel so picture-less I'll leave you with a few pictures of our bonsai tree that's currently blooming. I was trying out some different settings on our camera.
I'm so happy I haven't killed it. We've had it over a year and it's still alive, perhaps I can upgrade from a totally brown bordering on black thumb to a brownish thumb. : )
post signature

16 May 2011

Tank Success

I'm very happy that this is going to be a post where I show you a finished product rather than a half-finished disaster. There were several times during this project that I was afraid of where things were going. I've been toying around with the idea of making a tank out of some light paisley fabric I got practically for free at a garage sale a few months ago.
I sort of took a break from being an adult last week while Hubs and I both had a cold (at least in the cleaning department). We cleaned over the weekend, so we caught up to the point where I felt like I could make another huge mess sewing. : ) I traced a tank I already had, but I tried to adjust it a little by making the straps wider, the neckline higher, and the body slightly slimmer.
And I used a pen to trace. Real professional. But if no one is going to see it on the final product I don't see how it matters. I just have to never mess up.
I used a candle holder flipped upside down to make the curve on the neckline. It was within reach and was a pretty good size, so I went with it.
A few tips if you try this:
  1. Don't try to make too many changes to your existing piece - it's hard.
  2. Just eyeballing it is not always the best plan.
  3. Ironing your fabric and tracing/cutting on a flat surface is definitely a good idea because if you don't, your bottom edge might just look like this:
Hahaha! Yeah, not the best first try. I was seriously doubting my skills at this point. Did I mention I've never made clothing without a pattern before? And only a few items with a pattern. I trimmed and moved on. I'm not really sure what the standard is when making a shirt, but I put the front and back together before I hemmed anything. Mostly because I wanted to see if I should even continue - I didn't want to finish all of the edges only to find out it didn't fit.

Does anyone have a better way to finish edges on shirts? I wasn't really sure if this was the best method. I pressed the edge under about 1/4" then again 1/4".
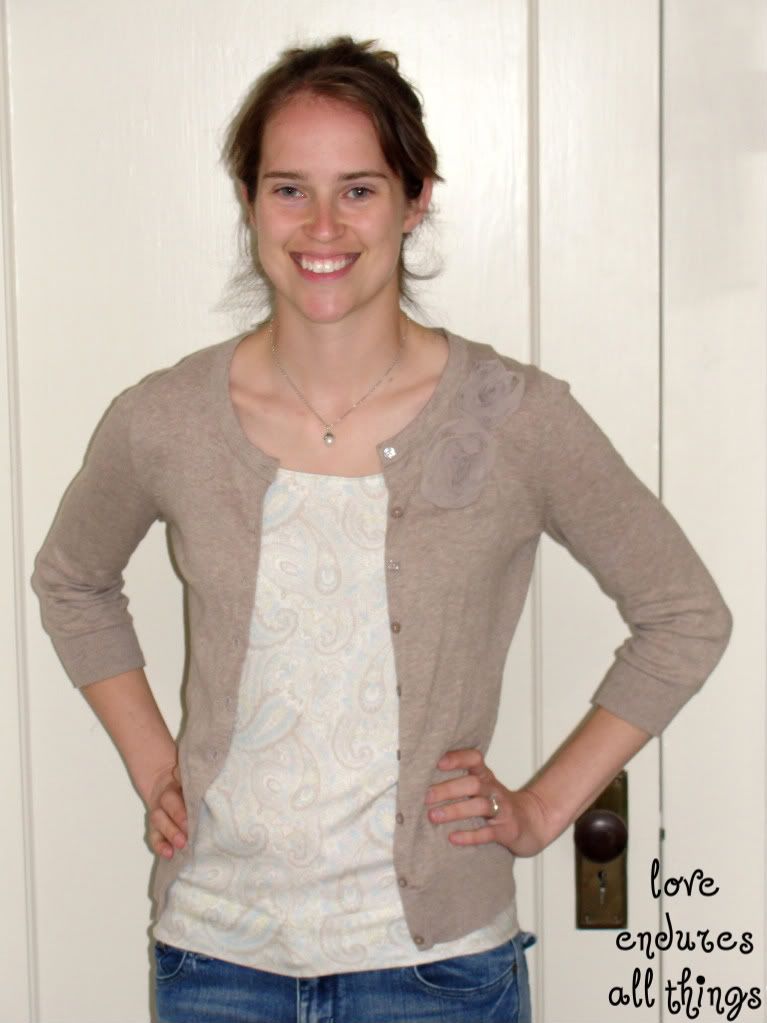
The hem on the bottom was about 2" because it would've been a little to tight around the bottom if I left it longer. Without further ado, here are some shots the finished product!
I talked Hubs into being my photographer since it was dark and mirrors and flash don't get along. You can thank him for directing me to do the next pose. It's ok to laugh. : ) What's worse is this is actually one of the best ones, hah! I guess America's Next Top Model is not in my future.
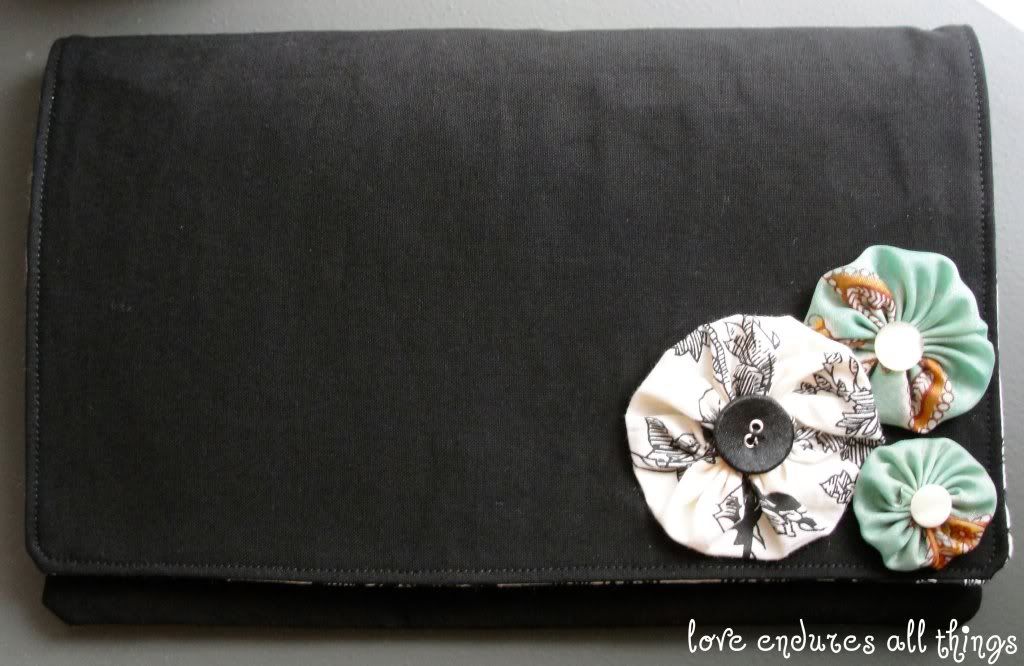
Sorry it's a little blurry. Here's a closeup. I had a hard time getting one that would show the pattern well.
Yes, this is hanging on our thermostat. Isn't that where you hang your freshly sewed clothes? Thanks for reading! I was so excited with the finished product, especially when I wear it with that cardigan! Really I would've been happy with something that was just wearable, so this surpassed my expectations.

Just realized I forgot to mention what kind of fabric it was! It isn't your standard cotton and I don't think it's knit either. It's soft like a knit but thinner and a little more drapey. So basically I'm saying I don't know exactly what it is, but it's comfy! I'd love to hear what you guys think since this is my first clothing experiment!
post signature

08 May 2011

I'm back

Please excuse my bloggy break last week. We were visiting family, so I let blogging slip to the back burner for the week. Since I didn't make much while we were gone, I thought I'd share a couple things I made recently and haven't shared yet. Although I did pack some fabric and even contemplated bringing my own sewing scissors. Hah, am I going crazy? Maybe.

Anyway, I made this clutch for my mother in law's birthday.
I would love to add a clutch to my Etsy shop next...that is, as soon as the magical time fairy visits to grant me a few extra hours one day!
 Aaaand a picture of the inside:
Now for Mother's day presents. I forgot to take pictures of the presents I made for my mom. Oops. But here's a picture of me modeling the apron I made my mother in law.
We gave it to her a few minutes before we left this weekend so I didn't get to see it in action.
Hope everybody had a good week!
post signature