Well, Hubs has figured out what this whole sewing thing can mean for him. I don't like the elastic in my workout pants...no problem, my wife can sew! I want my too short pants turned into shorts...no problem, my wife can sew! There aren't any drink pockets on my favorite backpacks...you get the picture.
Not that I mind lending my sewing skills. It's kind of nice because if you haven't noticed, most sewing projects are more cute than manly. So this week's project was adding water bottle pockets to two of his backpacks. We end up always carrying my backpack when we go on hikes because its the only one with pockets for our drinks, but I think Hubs prefers his backpack.
I've done all of the figuring for a Camelback water bottle (picture below), so if you happen to have one and you happen to have a backpack in need of another pocket, you're in luck! You'll need some backpack-ish fabric (1/4 yard is plenty), elastic...and I guess that's about it other than thread and my super-helpful instructions (that's the blue sticky note).
This assumes you have a 3 1/2" wide section on your backpack to work with. Rectangle should be 7 3/4" tall and 7" wide. The diameter of the circle is 3 1/2" and I cut a straight line across it so it would be easier to attach to the backpack. The elastic should be about 4 1/8" or 4 1/4" long. You could definitely go longer, but I wanted it to be able to hold smaller plastic bottles as well.
First, fold over the top of the rectangle to allow a gap for the elastic. Pin it down and sew across.
Feed the elastic through.
Make sure you pin the end when it gets close otherwise you'll end up with the elastic floating around in the middle and that won't do you much good.
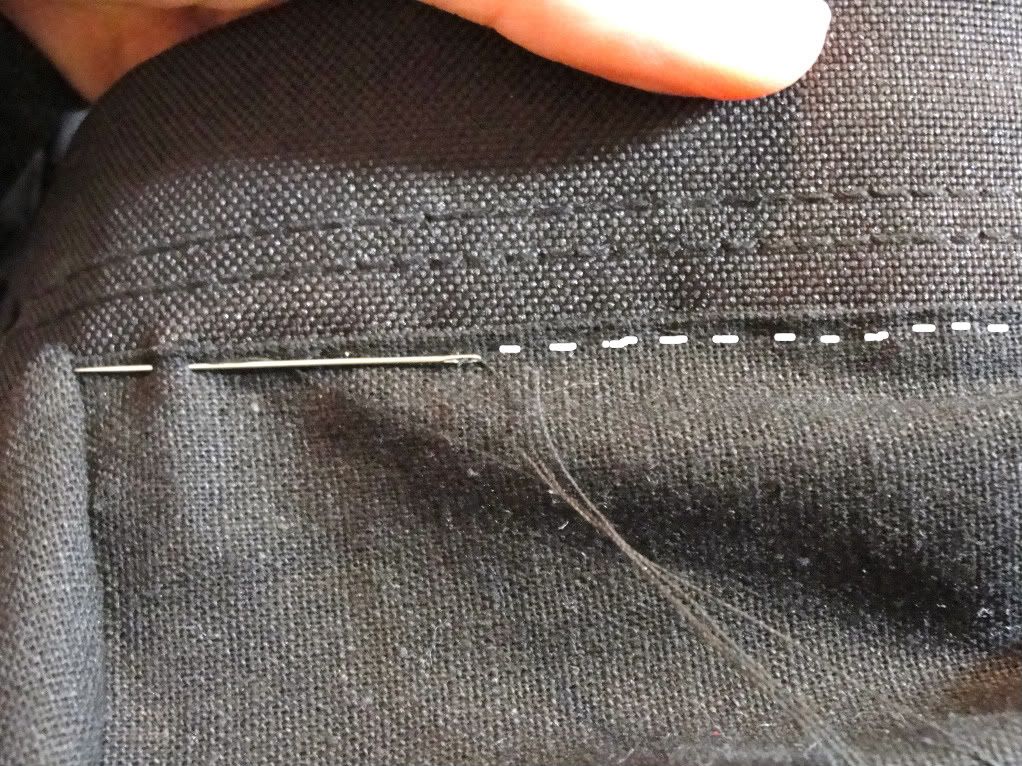
Now you can sew the ends so the elastic stays in place. This side has been sewn, but since I used black thread I highlighted it for you.
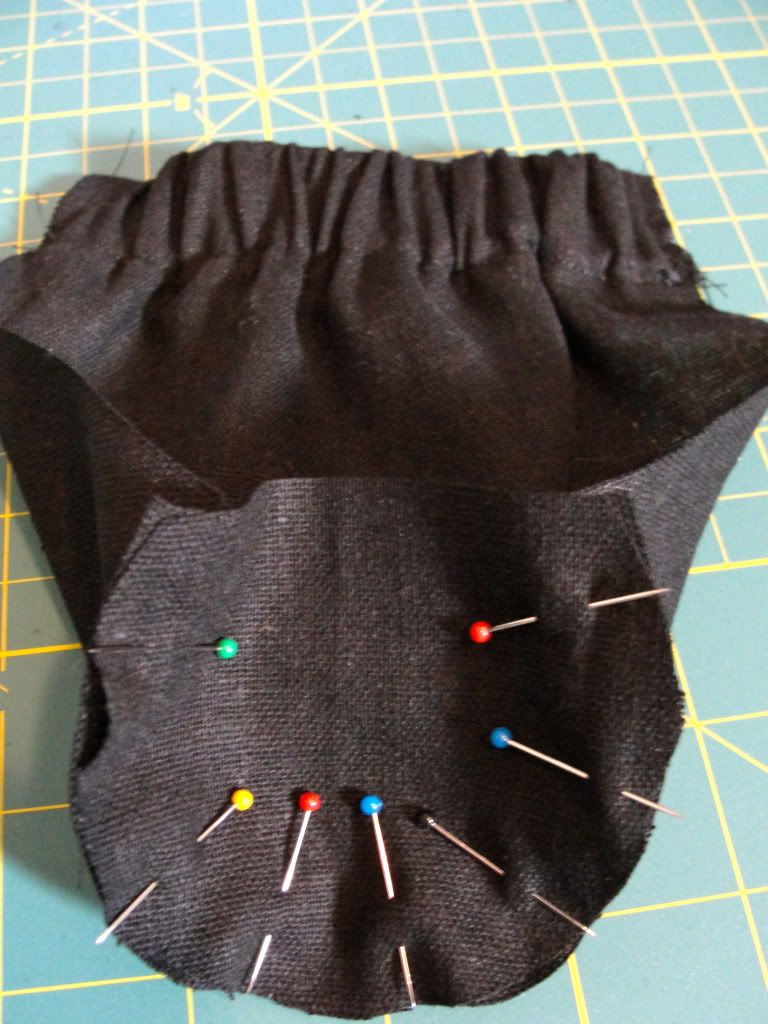
Alright, now you're going to pin the circular piece to the rectangle. Pin it to the finished side (the one that will be on the outside) of the holder.
I didn't cut things with a very big seam allowance in mind, so I had less than 1/4" seam allowance. After it's attached it's looking kind of like this.
Now for the challenge - attaching it to the backpack. I marked off where I wanted it to go with a white marking pencil. Should be 3 1/2" between each side at the top and it will taper a little bit toward the bottom. I hate to do this to you, but you're just going to have to figure out what stitch is easiest for you and go for it. This is the second one I've done and I was way more frustrated with this attempt. This backpack was pretty thick so I was having more trouble.
Make sure you tuck the unfinished edges under so everything looks clean. After you go around the three sides you may want to go over the top inch or so again on each side. My first attempt already needed a repair because the thread at the top stretched way out (don't worry, I added some length to the elastic for this version and it made a big difference in the ease of getting the bottle in and out).
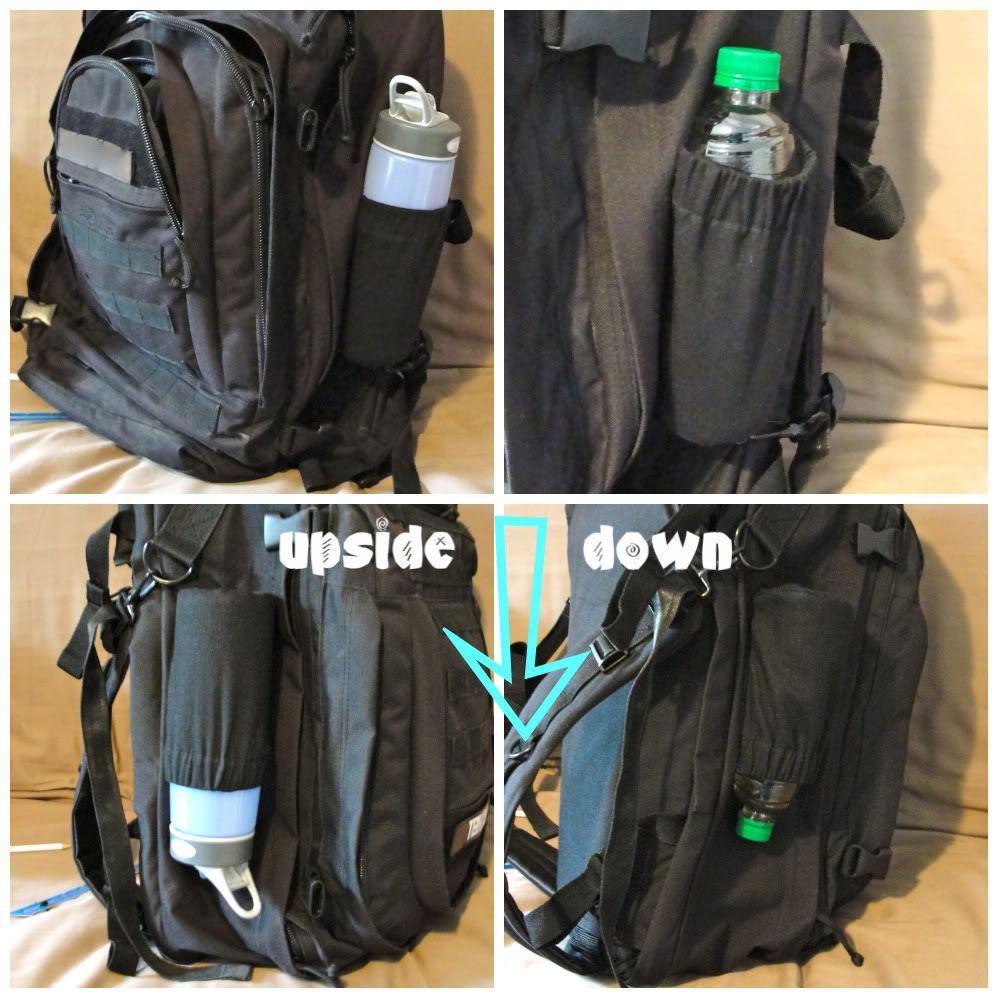
So it holds a larger Camelback bottle as well as smaller plastic bottles. Aaaand they don't even fall out when they're upside down thanks to the elastic! Have you had any weird sewing/modification requests?


Looks great! I would not even know where to begin a project like that.
ReplyDeletethat's cool! :) great job of figuring, Susan!
ReplyDeleteLove your blog!! Its so cute!!! I am your newest follower!!! i would love to feature you on my blog. so let me know!! :) So if you would like to go and check out my blog and follow me too! That would make my day!!! :) I am so excited to start blogging and share my ideas on food, crafts, and mineral make-up. I will also be doing giveaways on stuff, like mineral make-up. So look out for it!
ReplyDeleteThanks!
-Brooke
For-the-luv-of.blogspot.com
Nice work, Susan! Move to Germany after San Angelo so that you can teach me how to sew better!!
ReplyDeleteI'm doing this but I got an old lunch box and cut out the insulation and put it under the fabric so my books don't get wet! (my bag is cloth)
ReplyDeleteVery clever. Love how you made it easy to take your bottle in and out.
ReplyDeletelisa
I'm making one of these but instead of putting it on my bag I'm putting it in bedside organizers I'm making for my family. Like the one here...http://www.sew4home.com/projects/storage-solutions/bed-caddy
ReplyDeleteThanks for your tutorial.
Thank you for this tutorial! I just added a water bottle holder to my husband's backpack. Great work!
ReplyDeleteThanks....just what I was looking for!
ReplyDeleteThis was an awesome tutorial! Making my own diaper bag and needed some bottle holders!
ReplyDeleteHi Susan, i understand this blog post is about 5 yrs old. I have a similar request and i would love to pay you for it. I got this bag online recently but didn't realise the one i picked doesn't have the pouch for bottles at the side. Let me know if you are willing to help fix one for me. Thks in advance, Arn
ReplyDeleteThanks! had a backpack with out any andthis really healped. I wouldnt know where to begin other wise! Thanks!
ReplyDeleteGreat idea! I was looking for some way to add bottle pockets for my sons' bags after the pockets gave away. Thanks!
ReplyDeleteSo I’m making a noodle head back pack pattern and want to adds water bottle pouch. Going to use your pattern but sew it in as I go. Think I may try fold over elastic that is sewn onto the top edge. Will post results.
ReplyDeleteThank you!! I wish I had found this great example on making round bottoms. I have made 2 yoga bags and struggled to fit the round bottom to the bags!! Thanks again!!
ReplyDeleteYour writing style is very approachable. Everything feels calm, organized, and easy to digest. Posts like this are great for people who want straightforward insights. Rental office space In bangalore
ReplyDelete