29 April 2011

Spring Wreath

Well there are plenty of things I could should be doing other than blogging, but here I am. Maybe that means I'm turning into a real blogger (as opposed to a person that is kind of trying out this blogging thing but largely has no idea what she's doing). Or maybe that's just wishful thinking since half of the pictures from this post are from my phone because I was too lazy to get my camera while I was working. : )

Either way, I'm excited to show you the wreath I finally finished. I love the idea that Myra at the Casabella Project had to make a simple wreath and put velcro on it so you can change the wreath easily based on the season. Genius!! (Especially for someone like me who just last week realized I forgot to reset one of the clocks at daylight savings. Oops) You can find her original post about it here.

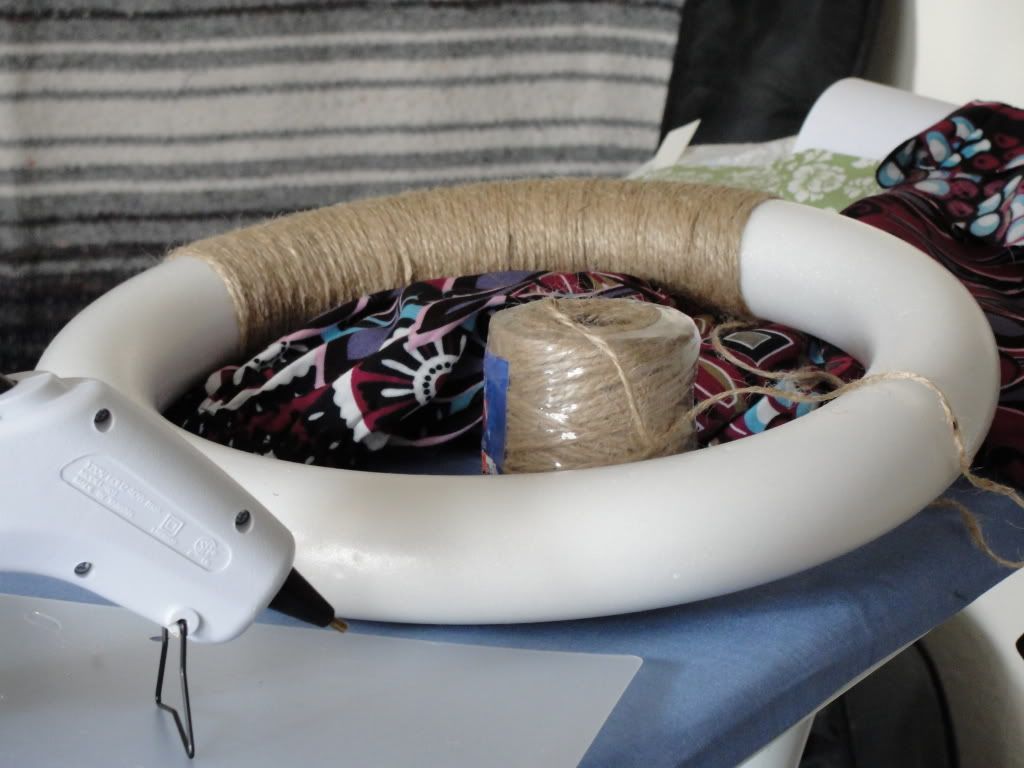
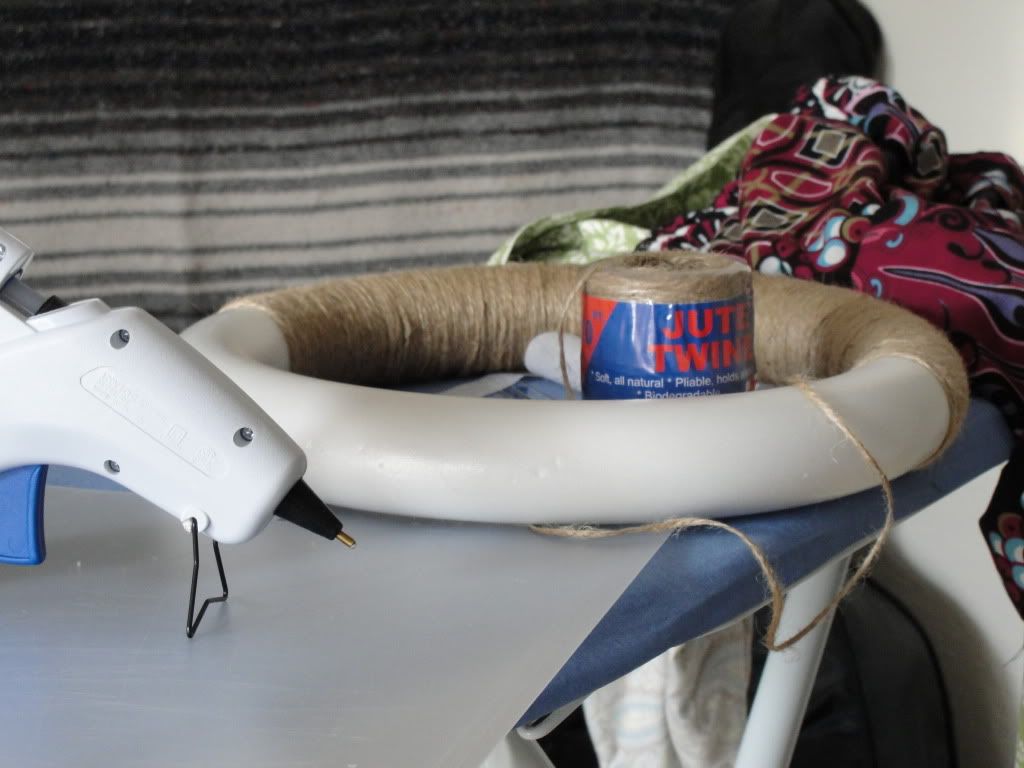
We had a roll of twine on hand (you know, just in case of a twine emergency) so I started wrapping. At first I was thinking the project would be easy-peasy and it didn't even seem like it was taking very long.....then this is when I took a break to check Facebook.
Aaand another break when I was starting to think I would never ever finish. Why do I always pick projects like this?
Anyway I finished wrapping and was very happy with myself. : ) But I still had no idea what I was going to put on the wreath. I tried making some rosettes with fabric scraps and found that I can make a rosette, but I don't think it's my forte. I had some small wooden letters leftover from another project and decided to spell out 'Welcome.' Unfortunately, I was short one letter.

I didn't let that deter me (although looking back I kind of wish it had). I cut one out of cardboard! That proved to be way harder than expected! Then I had to paint all of the letters so you wouldn't be able to tell which one was cardboard. Only the cardboard one wasn't as smooth so I used puff fabric paint to try to disguise it even further. Did you know you can use that on wood and cardboard? Because you can.

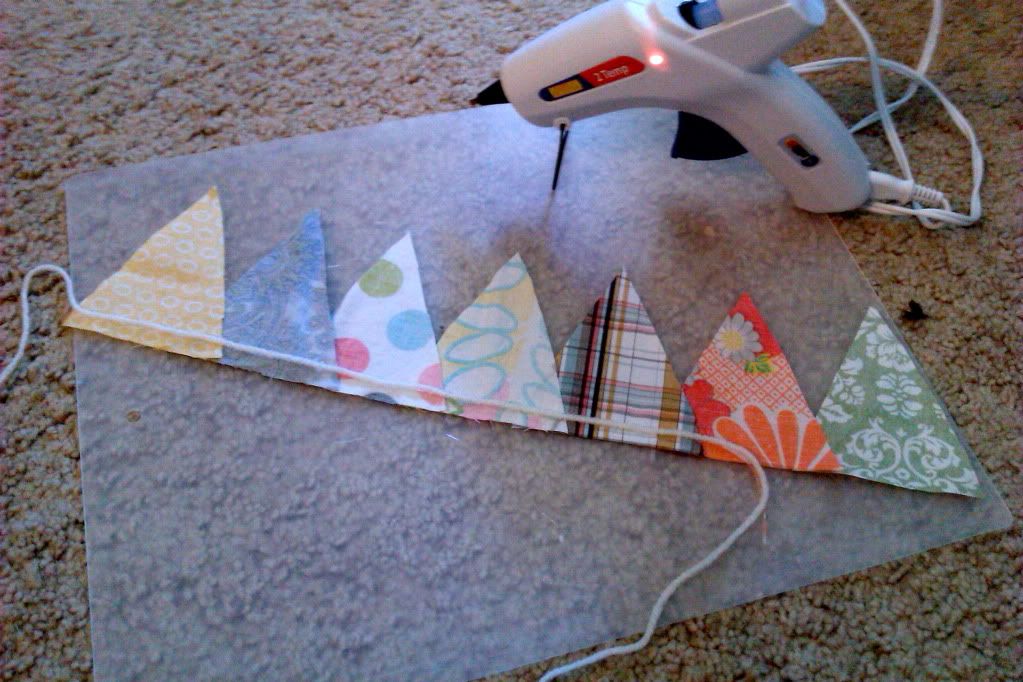
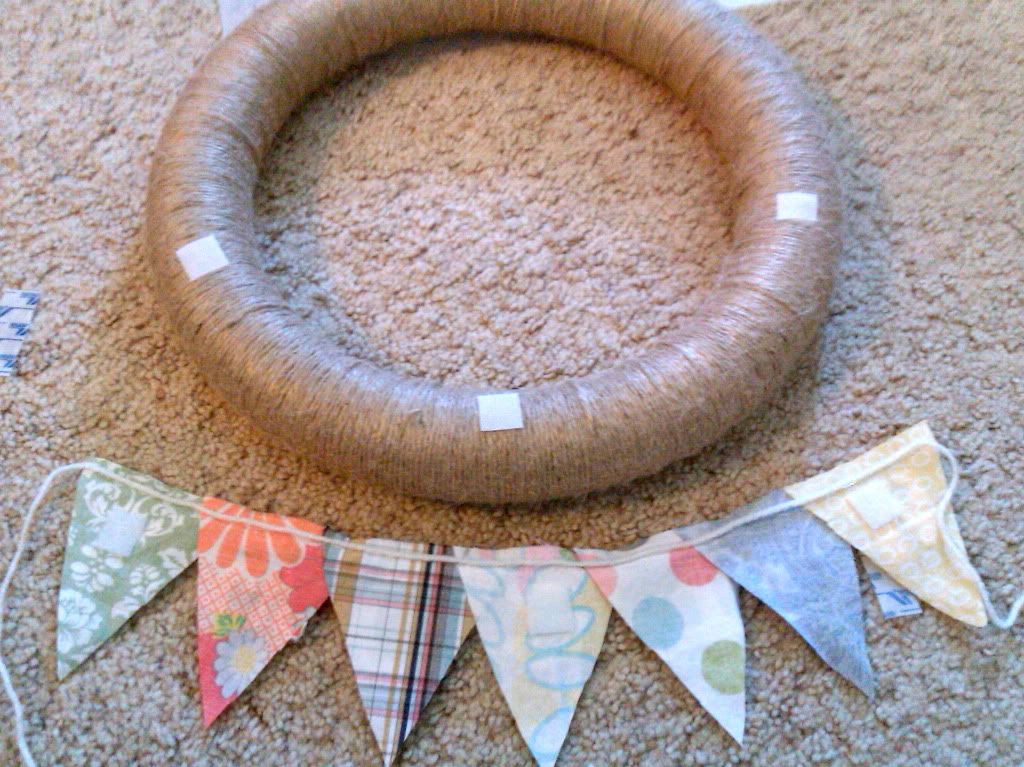
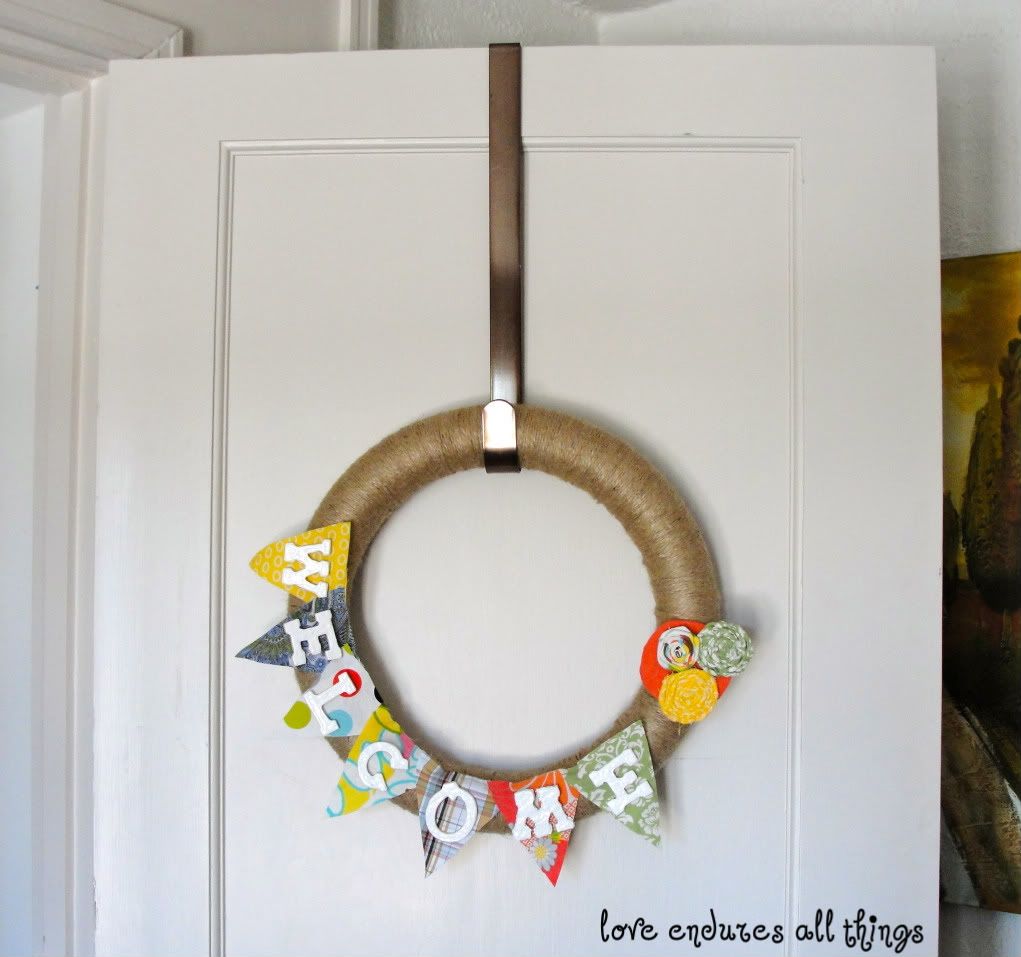
I am going to have to switch to the short version of this because this post is turning into a mini-novel (sorry!). Made a fabric bunting.
Added velcro to wreath and bunting.
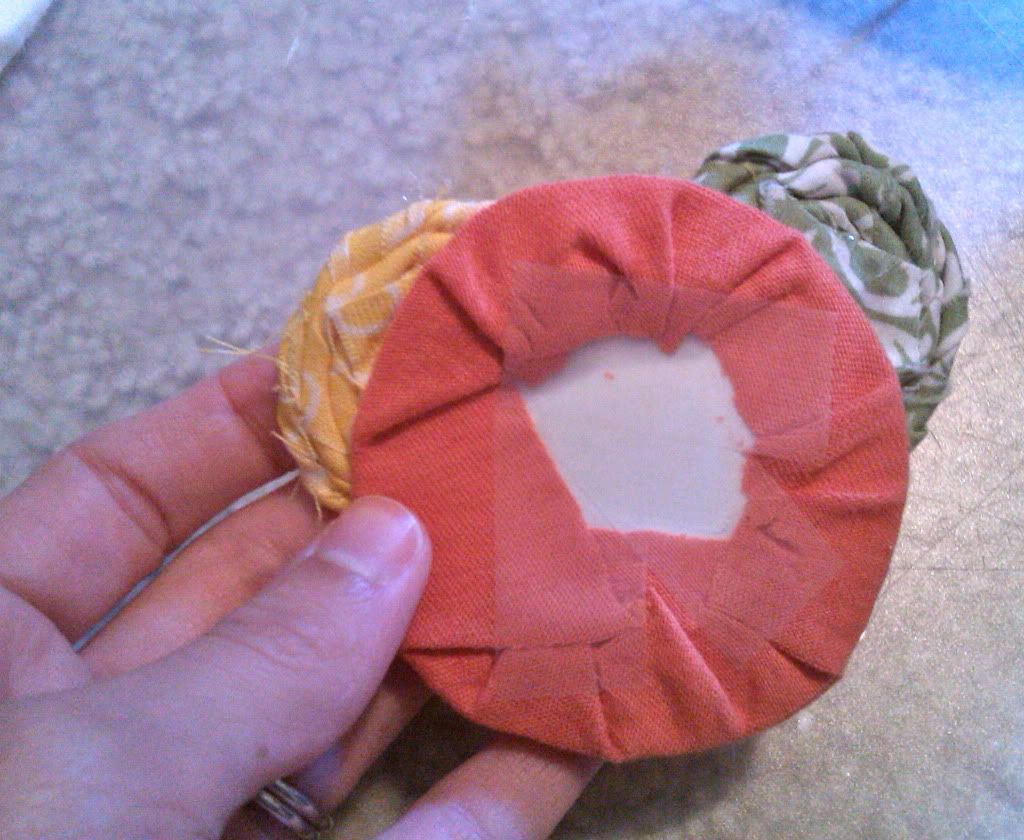
Didn't feel like making another rosette so I cheated by wrapping fabric around paper. Shhh, don't tell. : )
 
And viola! This is on the door at the top of the stairs coming into our place. (The house is split into two units so we have a front door on the ground level, but you immediately go upstairs and through this door)
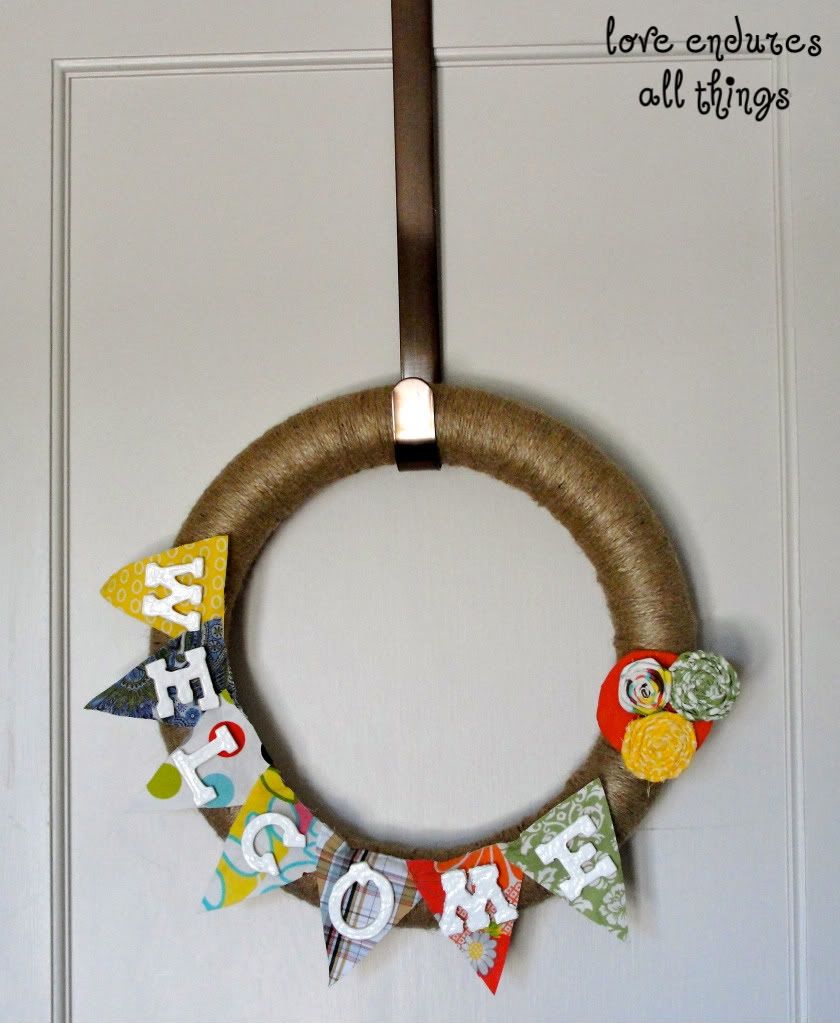
One more picture because I actually bothered to bust out my camera for the final product.
If you made it to the end, thanks for hanging with me! Have a wonderful weekend!!
post signature

26 April 2011

Pillow Fever

Our pillow selection in the living room has been a little lackluster (at best), so I wanted to add a couple new pillows to the lineup. Here are the pillows that came with our couch.
They have yet to make a debut (we got our couch a year ago). I don't like them. At. All. They are sitting in our front closet eagerly awaiting a yard sale. Instead, we had some ikea pillows, which are fine but they really weren't filling up the pillow cases very well.

I saw this at a link party and was in love and started making one right away.
Well that was dumb. I didn't stop to think about the fact that I have no rotary cutter so cutting all of the necessary pieces would take forever and a day. I also didn't think about how tedious things make me feel like the project is going to take the rest of my life and make me have little motivation to finish.

Thankfully, we were having people over in two days and once the fabric mess was all over the place I had to finish before I cleaned because what is more of a hassle than cutting a bajillion pieces of fabric? Cutting half a bajillion, having to clean them up all up, then getting them all back out again to cut the other half bajillion.
Now in reality, I'm pretty sure it didn't take me forever and a day (because I'm done) and I may have used slightly less than a bajillion pieces of fabric. The tutorial at V and Co is really good, so if you're interested in making the pillow I'd invite you to head over there because I was not about to keep up with step by step instructions as I was drowning in little rectangles of fabric.
Oh, and I also made a super easy pillow cover. Fold in half, sew two sides, leave one open to stick the pillow form in, close the hole and you're done. I won the fabric from Crafty Girls Workshop in a giveaway at A Law Student's Journey and I love it! I was a little nervous about buying fabric that I couldn't see or touch, but I couldn't be happier!
Here are some notes from the years I spent making the shag pillow:
  1. If you don't have a rotary cutter BEWARE!
  2. I didn't use quite as many strips per row as she did and it still looks quite shaggy.
  3. You can guesstimate on the measurements. After the first thousand few rows I stopped measuring the width, I just tried to cut kind of in a straight line. No one has noticed that my rectangles aren't completely uniform. 
  4. I used a pillow form instead of stuffing because I found two in my closet (score!!). Just alter the measurements from the tutorial to fit your pillow. I didn't leave any extra for seams because I wanted the pillow to be tight in the cover and knit fabrics are kinda stretchy. 
  5. I used leftover fabric from my tshirt quilt backing (which was really just a king size jersey sheet set) for the pillow, so I didn't even have to buy any fabric! I guess that's not really a tip, I just like the fact that this didn't cost anything.
Now go start a project without thinking it through!!! Just kidding, that's not the best idea. But it worked out for me this time : )
post signature

20 April 2011

Pocket Dumpster

Do you have any idea how many pockets are on a pair of ABUs? If you do laundry for someone who wears them (and are therefore responsible for checking all of the pockets for pens, watches, knives, money, etc.) you would probably say way more than necessary. The actual answer is 14 in case you were wondering, although that's not including the occasional pocket within a pocket.

Anyway, Hubs has lots of pockets so he has lots of stuff to dump out of said pockets when he gets home. Alas, after being here for over a year we hadn't really established a good place for all of that stuff. That occassionally led to panic at 7:30 the next morning when some random doodad had walked off and was nowhere to be found. The desk was an ok dumping ground, but who really wants 14 pockets worth of stuff on their desk everyday?

Enter crafty wife who doesn't like to panic and search for a reflective belt at 7:30am. I had an old hanging jewelry organizer that wasn't being used (and was recently moved out of the Goodwill pile to the infamous "almost Goodwill but I decided to save it for a project" pile).
It took me a minute to figure out what fabric to use. Obviously anything floral or polka dotty was completely out of the question. It would've been cool to use the same fabric as his ABUs, but none of his uniforms are worn out to the point that I would cut them up and those things are expensive! So I found a pair of pants in THE pile (you know the one I'm talking about).
They're a dark brownish black herringbone, sorry for the terrible picture. After some seam ripping I had all of my pieces ready to go. Except the trim on the jewelry organizer was plastic-y white and generally just looked terrible on the pants. So I cut some little pieces to sew over the edges.

If you happen to try something similar and you haven't used vinyl before just keep in mind that if you poke a hole in it, the hole will be there forever. I didn't like sewing the vinyl very much since minimal pinning = stuff shifting around a lot. I used the hem of one of the pant legs to make the loops for hanging.
Certainly not the prettiest thing I've ever created, but I'm hoping it's usefulness will make it awesome despite it's homely appearance.

And I know I could've made fabric baskets faster, but that would defeat the whole get-things-off-the-desk purpose. And I could've used fabric instead of vinyl for the pockets, but Hubs wanted to be able to see what he was grabbing. I know this post probably won't help a ton of people out there, but if you've ever washed a uniform you can at least sympathize with the ridiculous number of pockets. Seriously...14?
post signature

18 April 2011

Baby Name Taggie

I'm sure everyone has seen taggie blankets for babies (taggie? is that even the correct name? who knows). This is what I'm talking about in case the name is totally off base.
Thank you Google Images. I kind of remember seeing an idea that was like a taggie blanket, but just an initial. I liked that, but I thought I could do something a little different.
First I found a bubbly font and made it really big then cut out the letters after they had been printed. This should give you a little size reference.
I think I had two letters per sheet of 8 1/2" x 11" paper. Once you have your letters you can trace them onto the fabric. I added a little extra for seam allowances so the letters would end up about the same size as the printed letters. Since I used fleece it didn't matter as much about wrong/right sides, but when you're tracing and cutting just double check that the right sides will be out when everything is assembled.

Sorry I don't have more in-process pictures. Sometimes I get started and forget about blogging/picture taking until I'm done. (That and I didn't decide whether I would post this or not until this morning : ) Then cut little ribbons and pieces of fabric and felt to your little heart's content!

Pin everything together like this: letter piece 1 (right side up), ribbon with ends sticking out, letter piece 2 (right side down). Maybe that made sense? I briefly thought about bringing in one of my masterful paint drawings to help explain, but in every case this case I think it might make it even more confusing. Leave a hole for turning - preferably one that is larger than your finger!

Stuff, sew up the hole, and you're done! I don't remember how long this took me, but I don't think it was a really long time (wow, so helpful of me to share that piece of information, I know). Here's a side view so you can see the stuffed puffiness of it.
I almost forgot about one part! I made a loops with velcro on each letter so you can attach the letters or have them separate.
I thought it would be fun to be able to take them apart and put them back together. Plus, this way if he decides to change his name to Zera or Raze this gift still totally works. Hah!
post signature

12 April 2011

Check out my Checkbook

Could a title get more corny? Probably, but I won't go there tonight. I'm here to share my new and improved checkbook cover. You tell me which one is cuter (don't worry, I gave you a little hint).
If you guessed the super duper cool plaid one, you'd be correct! You won't be disappointed by the inside either.
Sorry if you feel like you're not getting the whole effect. I just didn't feel like putting all of our bank account information on display. The fact that I got to show off the new nail polish I got today too is just a bonus : )

And I bet you'll never guess where I got the fabric (unless you've already scrolled down...).
That's right. A pair of shorts. Those shorts gave me a few good years (ok probably more like several at this point, they needed to be retired). I wasn't loving them anymore though so they were in the formerly Goodwill, now potential sewing project pile.

The pattern, which I actually followed almost exactly, is from Weekend Sewing by Heather Ross. This is the first thing I've made out of the book, but there are other things I'm looking forward to trying like a giganto purse (my title, not hers), an apron, and pj pants.

I picked the book up at my local library and it even came with patterns! So if you haven't already, head to your library and see if they have any sewing books. I'm very happy that ours carries a few sewing books, with patterns, that were written in the last 5 years (read: the patterns are for things I would actually use/wear rather than for items like an embarrassing jacket with shoulder pads). That kind of makes up for the fact that our even localer (localer? hmm probably not a word...it's closer to our house) library is only open 2 days a week for 4 hours...or something like that. So I have to go to the not quite as local library for books.

Hmm that last bit took me a little bit off topic and made it harder to end the post.... You should check your checkbook to see if you can deposit some more style in it. Go ahead and roll your eyes, I know it that was pathetic pushing it. I hope your week is off to a good start!
post signature

10 April 2011

Hello Bandwagon

Can I jump on?

I was kind of overwhelmed by all of the chevron patterns taking over. And theeennnn I joined the crowd. Way to be original Susan - not. Oh well, I think I should get bonus points for construction even if a million fifty other people made chevron projects this week.

I started with some extra placemats and the vintage fabric I won from Country Chic Cottage a couple weeks ago.
Since I'm boring I like making clutches, I decided to make another one. After a little creative cutting and piecing and I had the outside.
Lucky for me, the fabric was already interfaced! I assembled the clutch and then thought it needed a little something extra on the front so I added a ruffle. I hand stitched it on since the clutch was already finished and I didn't want the seam to show on the lining.


So the moral of this story is - if life gives you stripes, you can make chevrons. Also, in this case the lemons were free so I paid $0 for my new clutch!
post signature

08 April 2011

Friday Fun - a few crafting oopsies

I thought everyone might enjoy a few funny pictures from when things didn't go exactly as planned.

First off we have hanging a picture frame.
No, that is not how pushpins or nails are supposed to look. Our house has many different walls. You can't be sure which type you'll get until you start trying to hang something up. On some walls, nails go in really easily (probably too easily actually). Others chew up your nails and spit them out. We have no idea what this mystery material is, but when Hubs doesn't get the nail in you know it's the wall not the hammerer. I mean look at his arm...
And that's not even flexed! Anyway (he'd probably be totally embarrassed that this is online so moving on!) we've had better luck drilling a tiny hole and then putting the nail in.

Another issue I run into pretty much every time I sew is leaving a hole for turning. For some reason I seem to think I can stuff something through a hole that is smaller than my pinky. No really, look at this hole that I had to fit stuffing through for a toy.
Smaller than my finger. If you couldn't tell, I went ahead and spelled it out for you. You're welcome : ) It's the same story with bags. I think I can stuff the entire thing through a 1-2" hole. When will I ever learn??

And finally, a sock creature disaster.
Oh, you don't think it's looks to bad (other than the unfinished face)? Well you haven't seen the back. Those with a weak stomach may want to turn away.
Ok so it's not horrible. But what kind of animal (even a fictitious sock animal) has a tail in the middle of its back? I can think of none. How did this happen? I wish I knew. Still not seeing the horror? Let me point out some landmarks to give a little reference.
Pretty sure he would have a sad face if he had a face right now. Perhaps a tail-ectomy would help this little guy. I guess I may be being a little over-dramatic about this oopsie, but I still don't think he's ready to be given to a child since they may be terribly confused about the random appendage coming out of his back.

Enjoy your weekend (and please leave adequate holes for turning)!

post signature


PS - just found out I won a giveaway at A Law Student's Journey! I don't think I could be more excited. And yes, I may have just done a little dance in my chair : ) More on this later!

06 April 2011

Alien Smoothies

We have a new favorite way to eat veggies where we pretend not to eat veggies. Sounds great, right?
Oh, I guess I forgot to mention it doesn't always look great. This night's variety included lots of strawberries and spinach. Red + Green = not a particularly appetizing color for your food. Tasted great though!

 I'm sure you're just dying to make something that color to eat, yeah right, but I don't have an exact recipe for these. So all of you "must follow a recipe exactly" types (ahem...Mom) are kind of out of luck. I'll tell you what we've used in the past and you can try out your own combination!

Alien Smoothie (Hubs said he felt like an alien when I first made this one. It was pretty bright green.)
  • Spinach
  • Crushed pineapple (from a can)
  • Pineapple juice from the crushed pineapple can
  • Frozen banana
  • Yogurt - vanilla or lemon, I can't remember
  • Mango sorbet (yum!!)
  • Vanilla protein powder <--that part is definitely for Hubs
  • Diet green tea - what? we were out of juice and needed something to help everything blend!

Less Pretty Variety
  • Spinach
  • Vanilla yogurt
  • Strawberry banana juice from TJs
  • Frozen mixed fruit - not sure how cost effective this is, but it sure was convenient! A bunch of strawberries happened to be at the top when I dumped some in mine but it also had grapes, peaches and mangoes
  • Soy milk
  • Vanilla protein powder...or not, we've made them both ways

When I make them I usually go pretty easy on the juice/milk/tea. The more you put in, the runnier your smoothie will be. Really it's just helpful to get everything blending and not so stuck together. We get at least a serving of spinach in each smoothie, woohoo! This makes up a big part of our meal because of all the sugar, so keep that in mind if you're counting calories. If you're not buying frozen fruit, make sure something in the smoothie is frozen unless you like really runny smoothies. I guess my only other advice is to experiment and use what you have. These are a great way to use up fruit that's about to go bad.

Maybe I'll remember to snap a less disgusting more appetizing picture the next time we make them!
post signature

04 April 2011

New Purse

I finished a purse for myself this weekend! You might have been thinking I had kind of given up on making things  (or maybe you didn't even notice because you read so many other blogs like I do), but I promise I've been busy. I've made a few gifts that can't make their bloggy debut until the person actually receives them. Ok, technically they could, but that might ruin the surprise.

This post may end up sounding like one giant disclaimer, but oh well. The idea for this purse came from Noodlehead's new 241 Tote, which I love. Really love. I kind of prefer bags with two straps though and I wanted to make sure the dimensions would fit my laptop so I decided to make one similar to it on my own.

See my beautiful sketch of what I wanted it to look like?
Bahahaha!  I'm lucky it turned out slightly better than my sketch! You don't have to tell me not to quit my day job, I know drawing is not my forte. : )

I'm happy with how it turned out, although as Hubs pointed out the fabric is pretty "loud," which is out of character for me. I originally wanted the side pockets to hold a water bottle too but due to a slight miscalculation they're only big enough for a cell phone or keys. Oh well.
Lipgloss also fits, but I rarely wear or carry it...there just happened to be a tube sitting next to my picture-taking spot.
I'm happy to report the waterbottle measuring fiasco did not affect the purse's ability to hold my laptop.
Fits like a dream...or something that implies it fits in the purse well. Yes, there's a ping pong ball in my purse. Just in case.
Why did I crop my lovely head out of the photo? Because I haven't mastered taking a picture without making some kind of awkward weird face. Nor have I mastered moving the DVD case for Tangled and the box of Wheat Thins out of the shot before I take pictures. Oops.

I hope you like it. I'm just excited all of the pieces fit together! Hubs couldn't stop laughing when I told him I used the Pythagorean Theorem to figure out the size of the triangles. Am I really that nerdy? How else do you make sure all of the sides are proportional? Feel free to laugh along with him because I guess I am that nerdy. So here's what you do after you finish laughing:
  1. a - Don't hate me for making something similar to something someone else made, I'm not trying to steal anyone's thunder I just needed 2 straps.
  1. b - Leave a comment telling me you don't hate me / you don't think my purse looks as bad as the sketch of my purse.   
  2. Go order Noodlehead's 241 Tote Pattern so I don't feel bad about not buying one you can make your own that looks more professional and can carry more than lipgloss in the side pocket.
  3. Have a wonderful week! 
post signature