My pocket is going to be pretty small, so my zipper is too long. There are instructions on the zipper for how to shorten it, but I'll list them here just in case.
Figure out where you want your zipper to end.
Whip stitch across the zipper using doubled over thread. Here's what they mean...Come up through the top of the zipper, then back down on the other side.
Then up on the first side, and so on and so on. Do this 8-10 times or just a lot if you lose count after 3. Tie off your thread.
Cut the zipper about 1/2" below where you stitched. Hopefully you can see the little stitched section on the picture below.
Do the same type of stitch on the other end of the zipper, but only a few times just so you don't have crazy ends sticking out while you're trying to sew. (Sorry, no picture for that step)
I apologize for the lighting being crazy in the next pictures. I kept going back and forth between two rooms (sewing machine and ironing board) and one had sun coming in and the other didn't.
Cut fabric for the pocket that is twice as long as you want your pocket and at least an inch wider than your zipper. My zipper was 4 1/2 inches and I cut my fabric 6 inches wide. Fabric was 7 inches long, which means my pocket will be 3 1/2" x 6" finished. Make sense? (I hope!)
Fold your fabric in half hamburger style and lightly press the fold so you can see where the center line is.
I interfaced around where the zipper will be. I've done a zipper without this step, but my fabric is pretty thin and it helps prevent stretching or tearing.
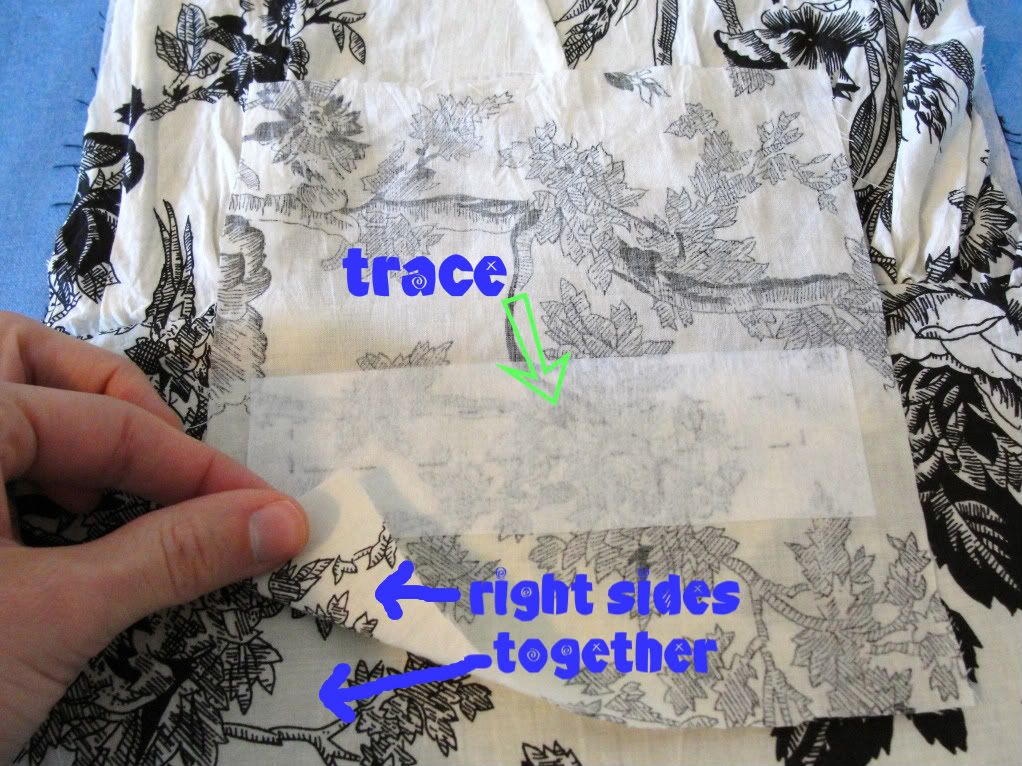
About 1/2" below the center line, draw a rectangle. Rectangle will be 1/2" high and as long as you want the zipper to be. This will be the hole your zipper goes in so make sure it is long enough to contain the USABLE section of zipper (do not add length for the tabs at either end of the zipper stops).
Pin your pocket piece to the other fabric (in this case, purse lining) RIGHT sides together. Remember, the rectangle you traced will be the zipper hole, so position the rectangle where you want the pocket to be.
Sew around the rectangle you just traced.
Cut down the center of the rectangle you just sewed. Stop about 1/4" from each end and make a diagonal cut toward each corner. Just make sure you don't accidentally snip the seam! You will be cutting through the pocket piece and the other fabric.
Next you stuff the pocket fabric through the hole you just made. This will likely make it look like you messed up. Not to worry, things look a lot better after you press them.
Press the pocket fabric so that everything lays (mostly) flat. The picture above shows everything pressed, the pocket is laying open and you see the back (wrong) side of the purse lining.
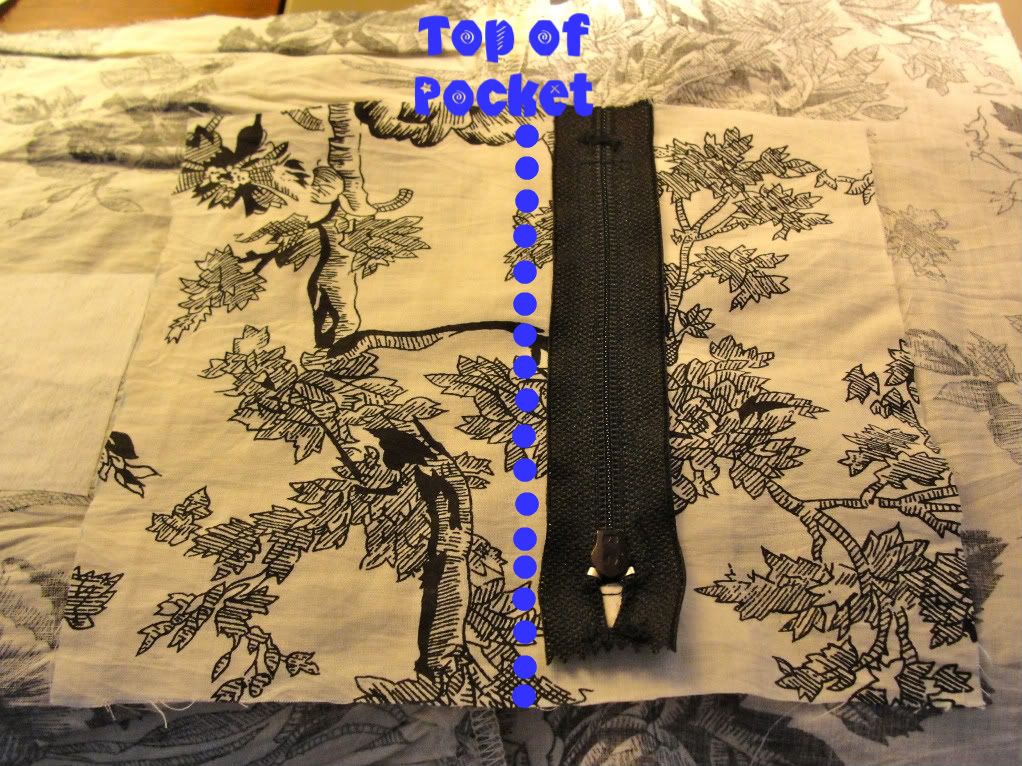
Position your zipper in the hole. So the order (starting at the table) is zipper, pocket, purse lining. The purse lining should be right side facing you. This should look how you want it to look inside the purse. Now I pretty regularly skip things
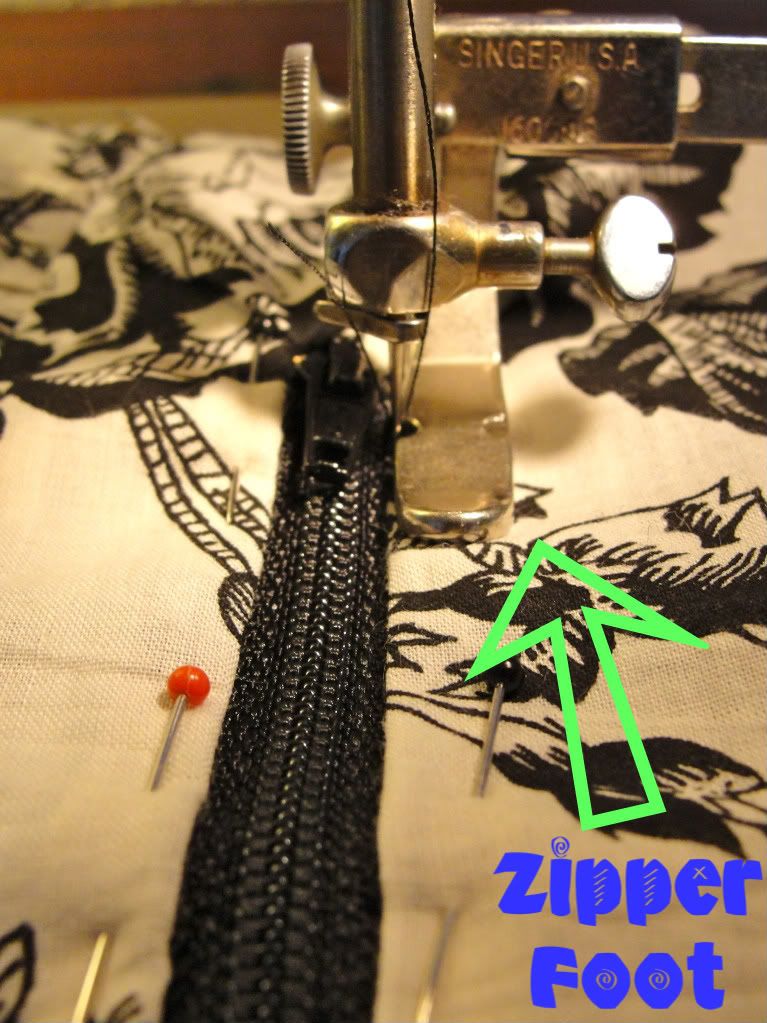
You'll need to use a zipper foot on your sewing machine for this part. I didn't know what a zipper foot looked like, so maybe the picture can help you find it. Basically the needle goes on one side of the foot instead of through the middle so you can get really close to the zipper. Sew very close to the edge of the fabric. (If you don't have a zipper foot, you might want to do a test run and see how close you can get to the edge. You may still be able to sew around the zipper without the zipper foot, but I haven't tried.)
Ta-da! Zipper is in! Now that wasn't so bad, was it? If this is your first time you might be saying, "Uh, yeah that was bad." But hopefully your zipper is at least attached in a semi-presentable manner and you'll probably breeze through your next zipper so easily you'll be convinced you're qualified to write a tutorial on it to correct all of the confusing things about my tutorial! And here's how things should be looking on the back now that the zipper is sewn in.
Time to sew the pocket up.
Sew along all three open edges of the pocket. Right sides of the pocket should be together. Be careful when you sew up the sides, you don't want to get any extra fabric in there. You can see I have the lining fabric folded back in the picture.
And now the finished product...
Back side - this will be hidden when the lining is put in the purse.
Are you as wiped out as I am after that? Hopefully not. I actually had a much easier time with the zipper my second time around. It's the tutorial writing that's hard for me. Totally worth it though because I'd hate for someone to feel totally lost (or worse, skip a project altogether) because of a zipper. That and it will help me remember next time too...I had to look almost everything up all over again this time around.
I've seen other variations to add a zipper pocket, so this is by no means the only way you can do it. If you have any questions or notice a hideous mistake PLEASE comment or email me and I'll try to clear it up. I'm still pretty new to


You make that look so easy! Wish I had my sewing machine so I could try a zipper. I've avoided them since I had to do a project with them in high school.
ReplyDeleteYou know what! I am just going to have to follow you now. Thanks for sharing this tutorial!
ReplyDeleteConnie
There is a product called something like wash away basting tape that you can use to "tape" your zipper in instead of using pins. It's usually found in the quilting section at JoAnn's. It's pretty narrow - approx. 1/4"
ReplyDeleteHere's a link to that basting tape
ReplyDeletehttp://www.joann.com/joann/catalog/productdetail.jsp?CATID=cat3456&PRODID=xprd315941
What a great tutorial! You make it seem super simple! I'll have to give it a try! :)
ReplyDeleteFrom Marmie: Wow! Good job on your tutorial. I like to hear all the things that you're doing.
ReplyDeleteWhen I was little I was always scared my uncle would zip my coat up and hit my chin.
ReplyDeletelisa